Follow this step-by-step guide to successfully install and verify the LytxOne Gateway and cameras. Make sure to complete each step before moving forward.
Step 1: Enter Asset Details & Verify Connections
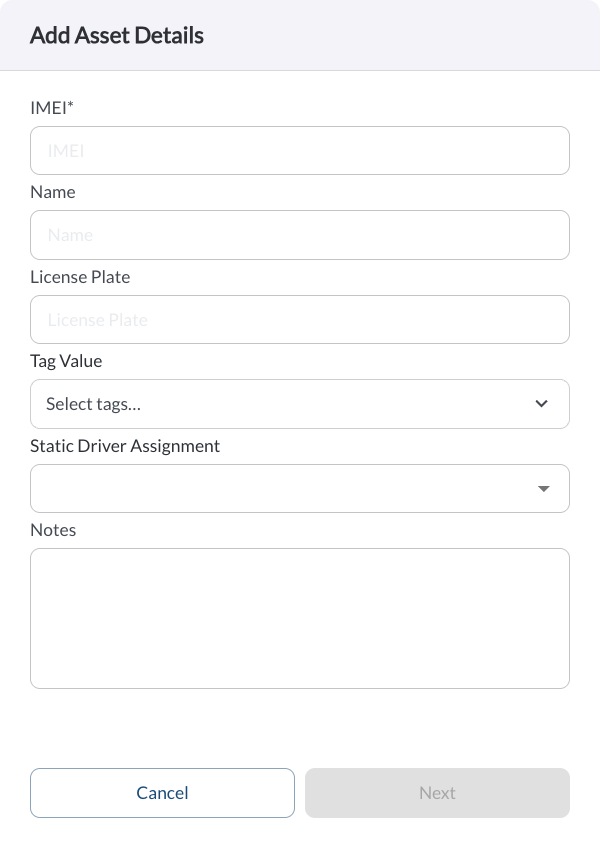
Enter the Asset details
-
IMEI - Pre-filled for existing assets (not editable). Required if adding a new asset.
-
Name - Pre-filled for existing assets. Required if adding a new asset.
-
License Plate - Optional, editable field for the vehicle’s plate number.
-
Tags - Optional, editable field for asset tags.
-
Driver - Optional, editable field for driver assignment.
-
Notes - Optional, editable field for additional details.
Note
Ensure required fields (IMEI & Name) are filled before proceeding.
Verify Connections
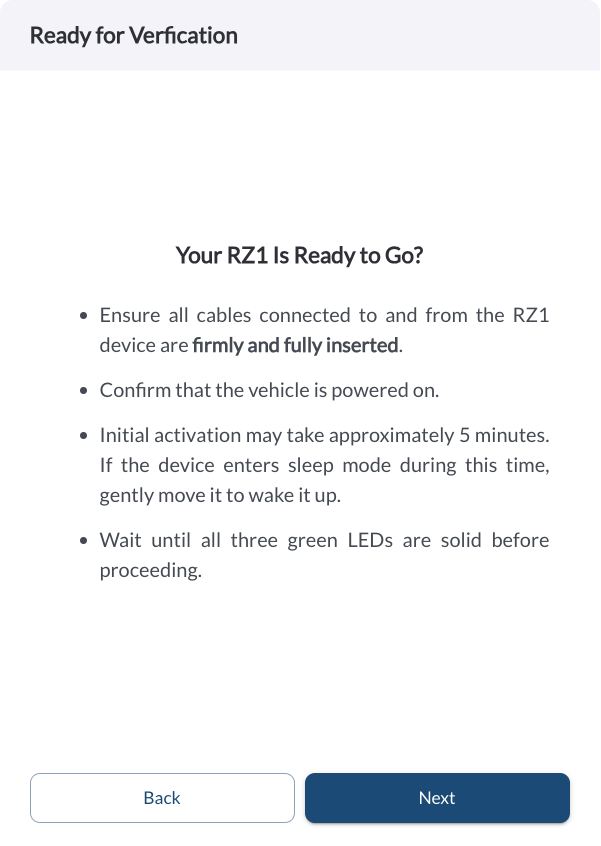
Make sure the LytxOne Gateway is fully connected and ready:
Ensure all cables connected to and from the device are firmly and fully inserted.
Confirm the vehicle is powered on.
Initial activation may take up to 5 minutes. If the device enters sleep mode during this time, gently move it to wake it up.
Wait until all three green LEDs are solid before continuing.
Tip
The LytxOne Gateway must be plugged in, and the engine must be running.
Please wait a few minutes before proceeding to the next step.
Step 2: Run Connectivity Verification Tests
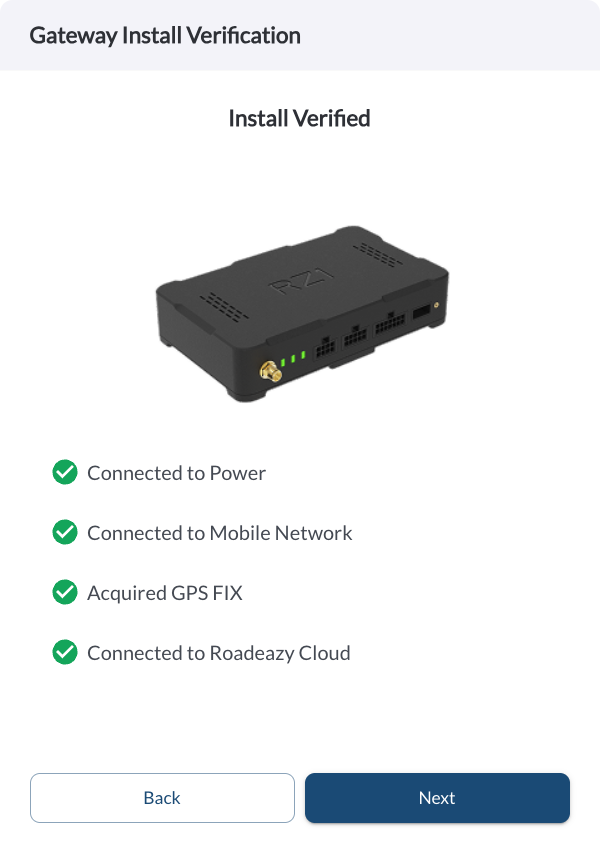
The system will now run four automated tests to check the device connection.
-
Power Connection – Confirms the device is receiving power.
-
Mobile Network – Confirms a stable cellular connection.
-
GPS Signal – Checks for proper satellite signal reception.
-
Cloud Connection – Confirms communication with LytxOne cloud.
What to do if a test fails?
If a test fails, refer to the Installation Troubleshooting to diagnose and resolve the issue. Once the necessary checks and fixes are complete, use the Retry button to run the tests again.
Note
If the power and mobile connection tests fail, you will not be able to
proceed.
Confirm Vehicle Details
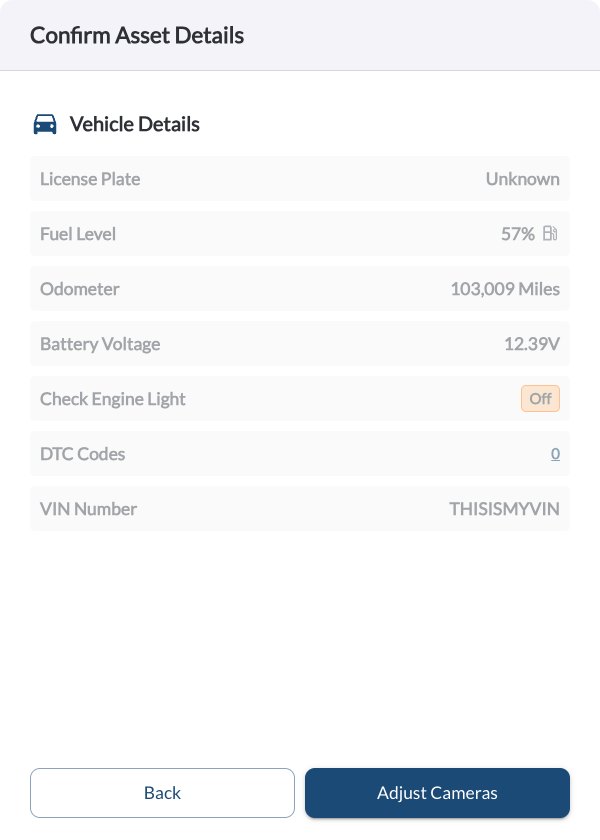
After the connectivity tests, verify the following vehicle details:
-
License Plate – Ensure the correct plate is entered.
-
Fuel Level – Check that the reported fuel level is accurate.
-
Odometer – Verify that the odometer reading matches the vehicle’s dashboard.
-
Battery Voltage – Ensure the battery voltage is within the acceptable range.
-
Check Engine Light – Confirm whether the check engine light is active.
-
DTC Codes – Review any Diagnostic Trouble Codes (DTCs) detected.
-
VIN Number – Ensure the correct Vehicle Identification Number (VIN) is displayed.
Step 3: Adjust Cameras
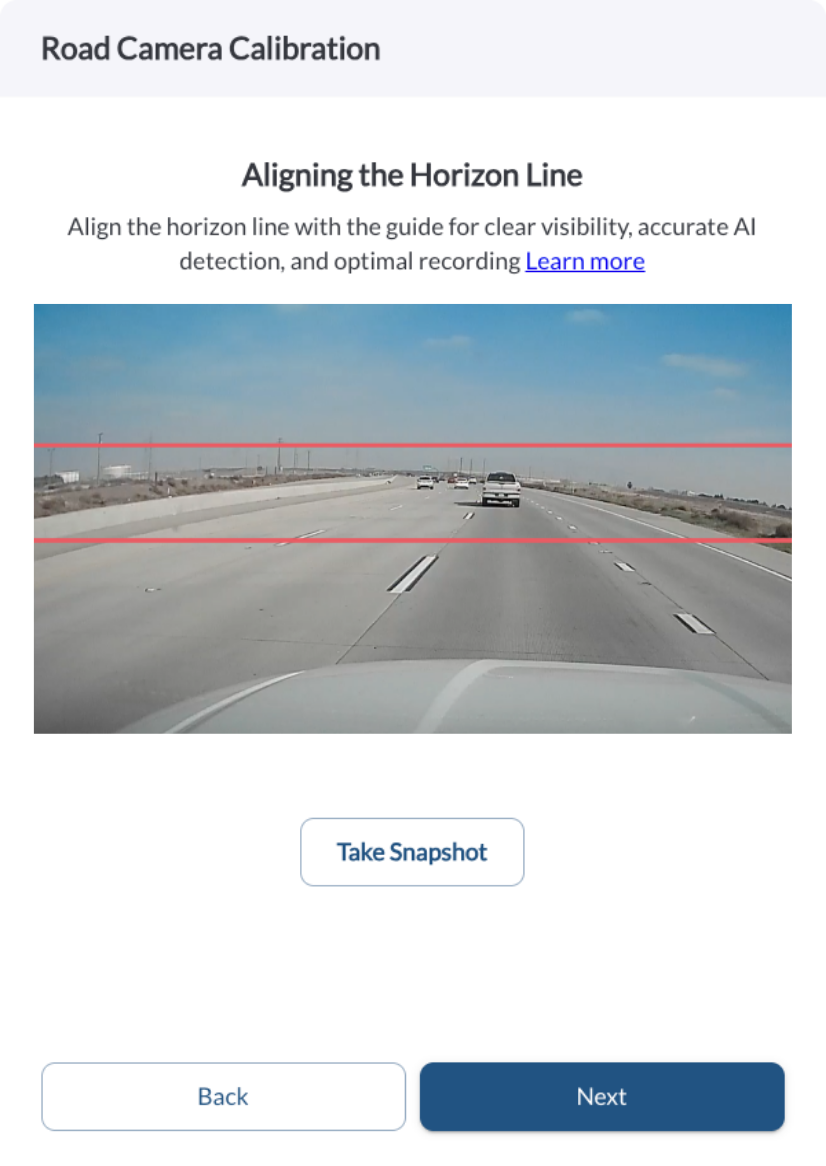
Road-Facing Camera
- Align the horizon line between the red guide lines displayed on the screen.
- Take a snapshot and review the image.
- If misaligned, physically adjust the camera position, then retake the snapshot.
- Repeat until the horizon line is correctly positioned.
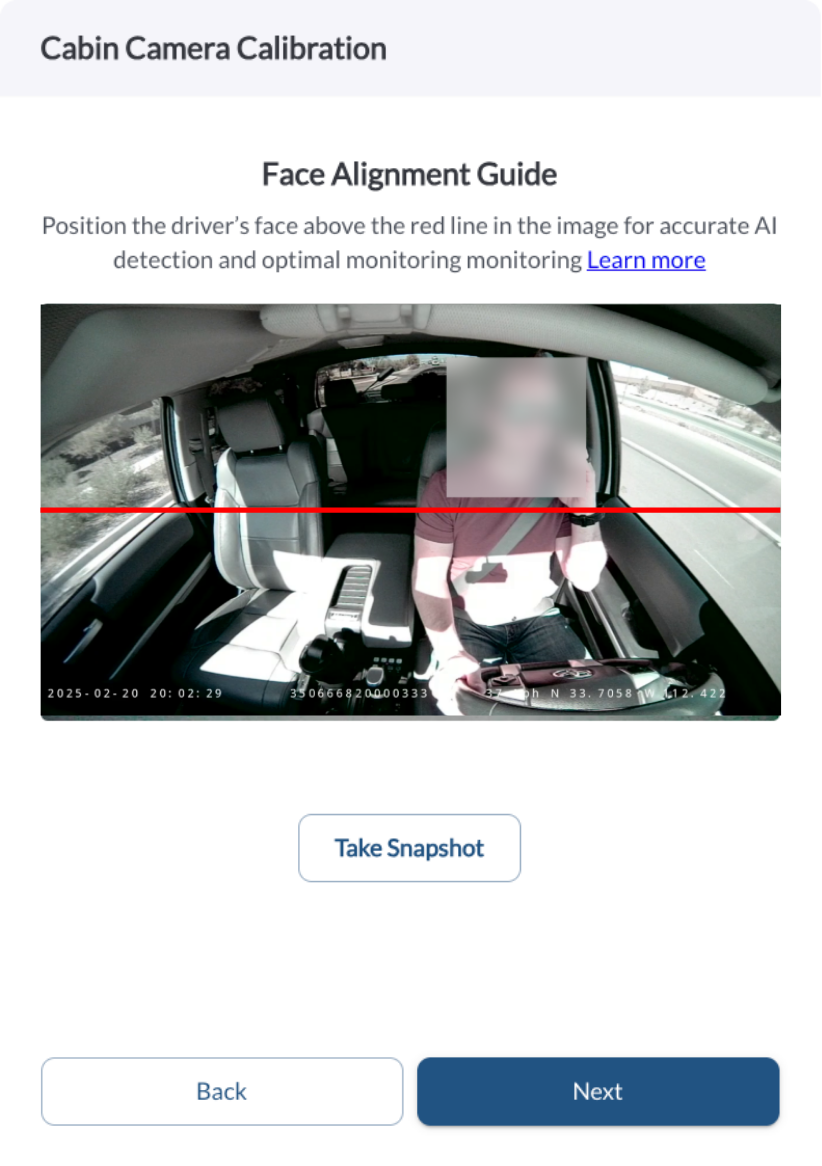
In-Cabin Camera
Step 4: Upload Installation Images
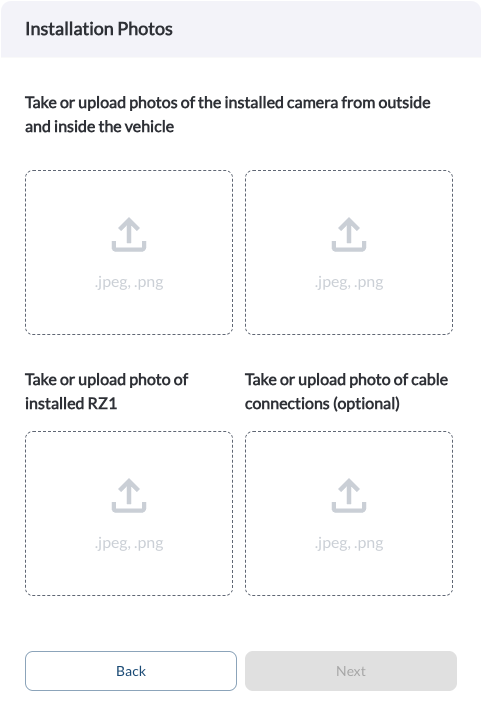
To verify the installation, upload clear photos as described below:
Vehicle Exterior Installation Photo (Required) – Show how the LytxOne Gateway and cameras are mounted from outside the vehicle.
Vehicle Interior Installation Photo (Required) – Show the internal setup, including camera positioning and device placement.
Installed LytxOne Gateway Photo (Required) – Close-up of the LytxOne Gateway mounted in its final position.
Cable Connections Photo (Optional) – Capture how the cables are connected to the LytxOne Gateway.
Step 5: Complete the Installation
A Success Notification will confirm the installation is done.
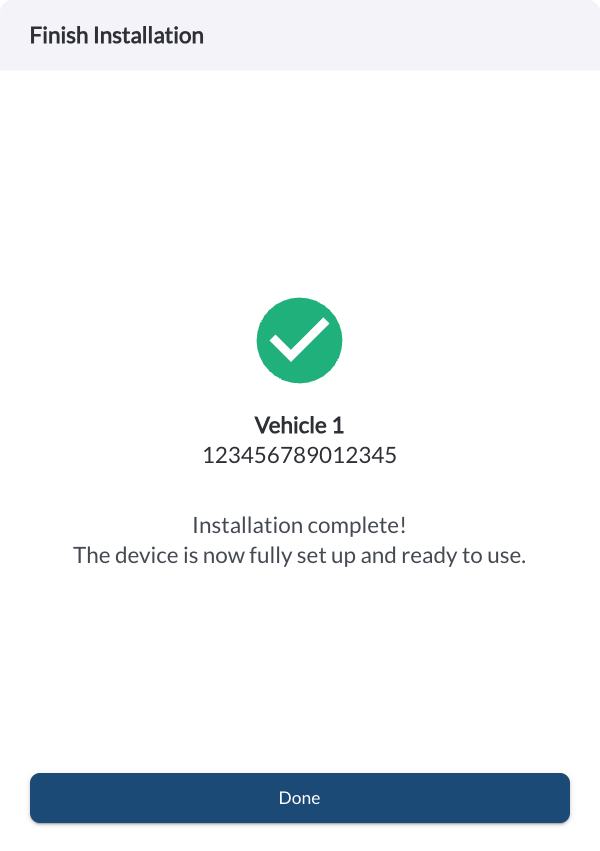
Congratulations! Your LytxOne Gateway and cameras are now successfully installed and ready for use.
Note
Once the device is powered on and connected to the cloud, it will be
automatically
activated and begin reporting data to the system.
Warning
If at any point after an in-vehicle device is installed a warning lights
up on the vehicle dash or the vehicle stalls or has a marked drop in
performance,
shut off the engine, remove the device, and contact your reseller. Continuing
to operate a vehicle with these symptoms can cause loss of vehicle control,
and serious injury.