How to Create a New Alert
To create a new alert, click the + Add Alert button at the top right of the Alerts page. You’ll be guided through a simple 5-step wizard.
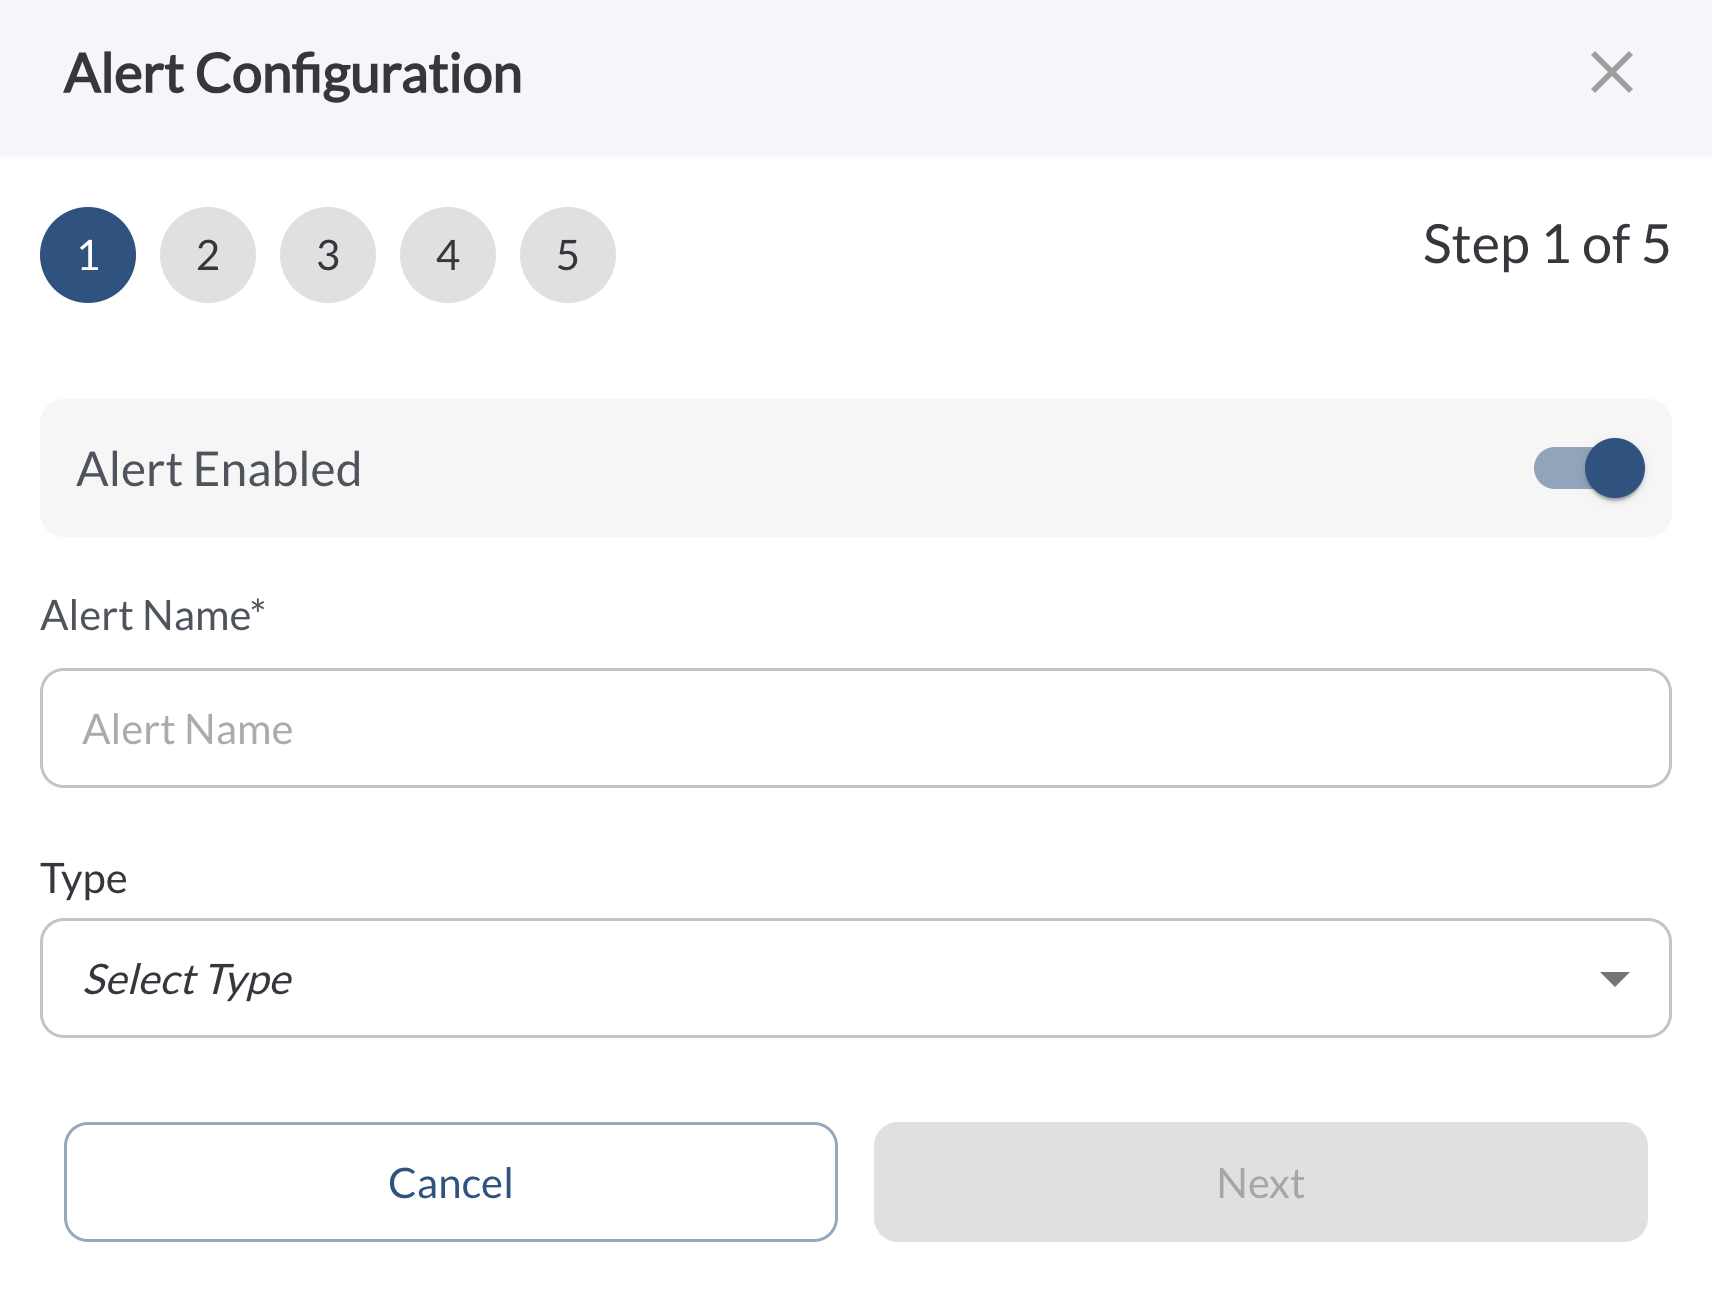
Step 1: Set Alert Details
Define the basic configuration of your alert:
Enable/Disable – Choose whether the alert is active.
Alert Name – Add a clear name to identify the alert (e.g., “Speeding After Hours”).
Alert Type – Select what kind of behavior or event should trigger the alert.
Note
To learn more about each alert type and when to use them, see the article:
Alert & Rule Types.
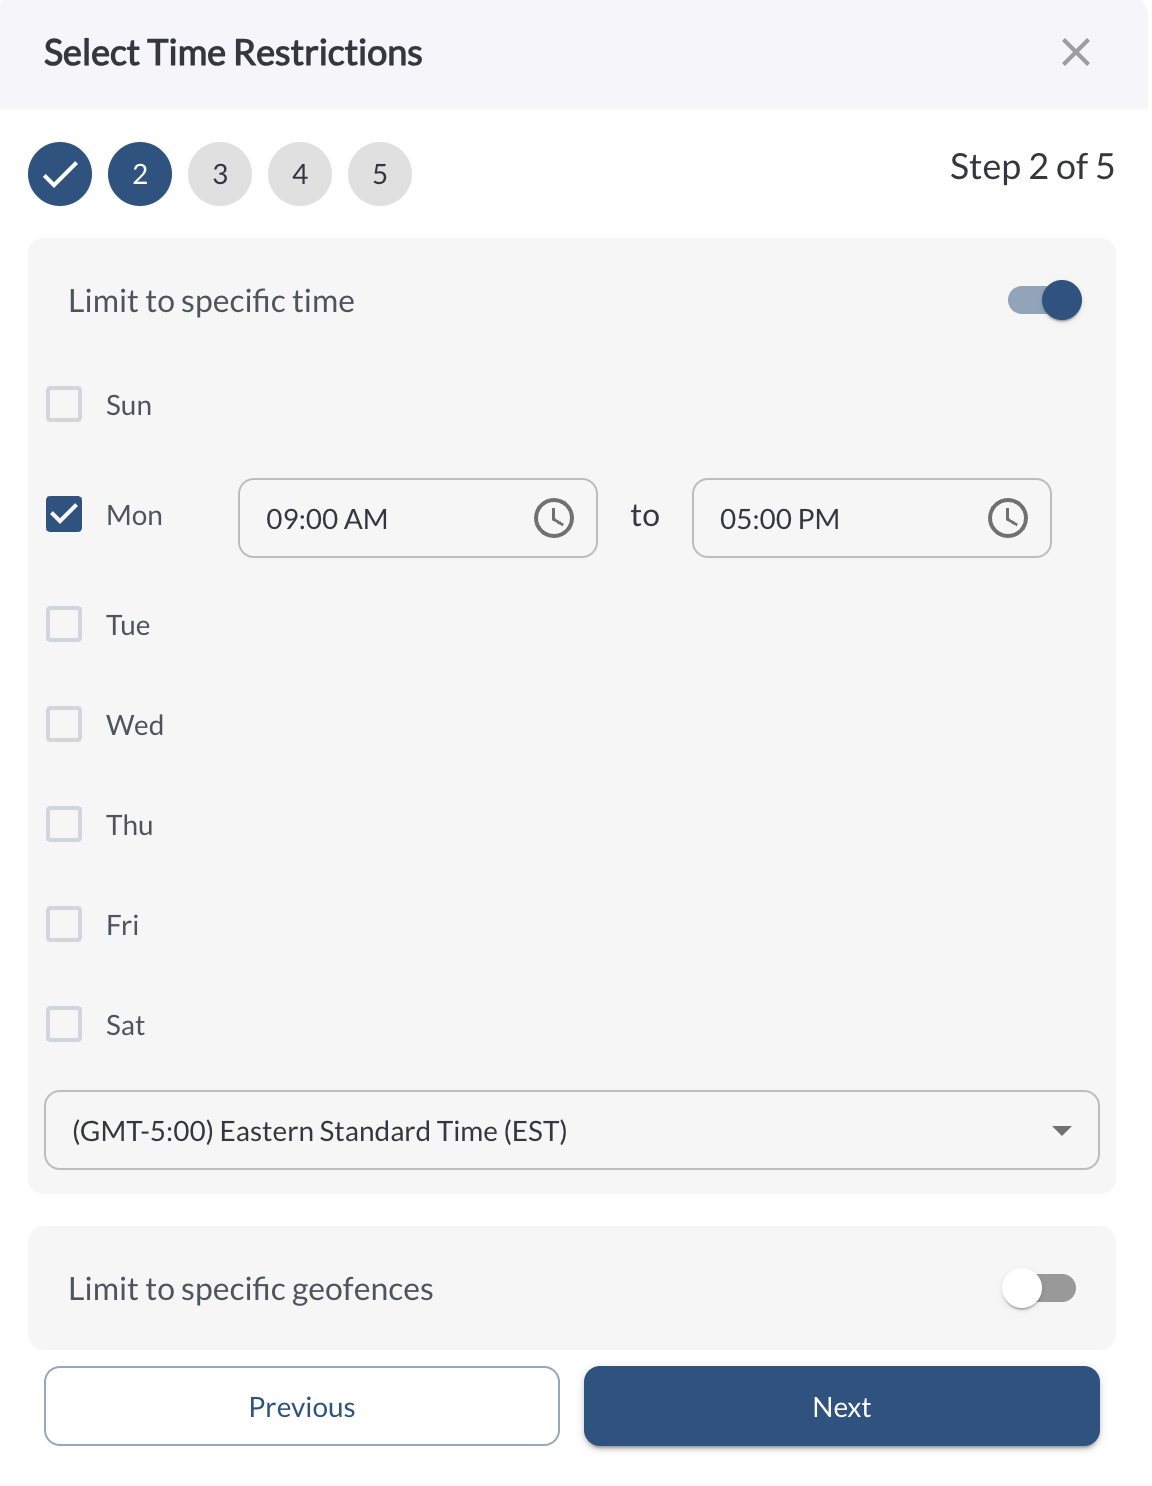
Step 2: Limit by Time and Geofence (Optional)
This step allows you to define when and where the alert should be active by enabling one or both of the restriction options:
-
Limit to Specific Time - when toggled on, this option reveals a day-by-day schedule where you can define the active hours for the alert:
Day Selection – Choose one or more days of the week (e.g., Mon–Fri).
Time Range – Set the start and end time for each selected day using the time pickers.
Timezone – Select the appropriate timezone so alerts match your fleet's operating hours.
Tip
Use this to trigger alerts only during specific working hours
or
off-hours (e.g., after 6 PM or weekends).
-
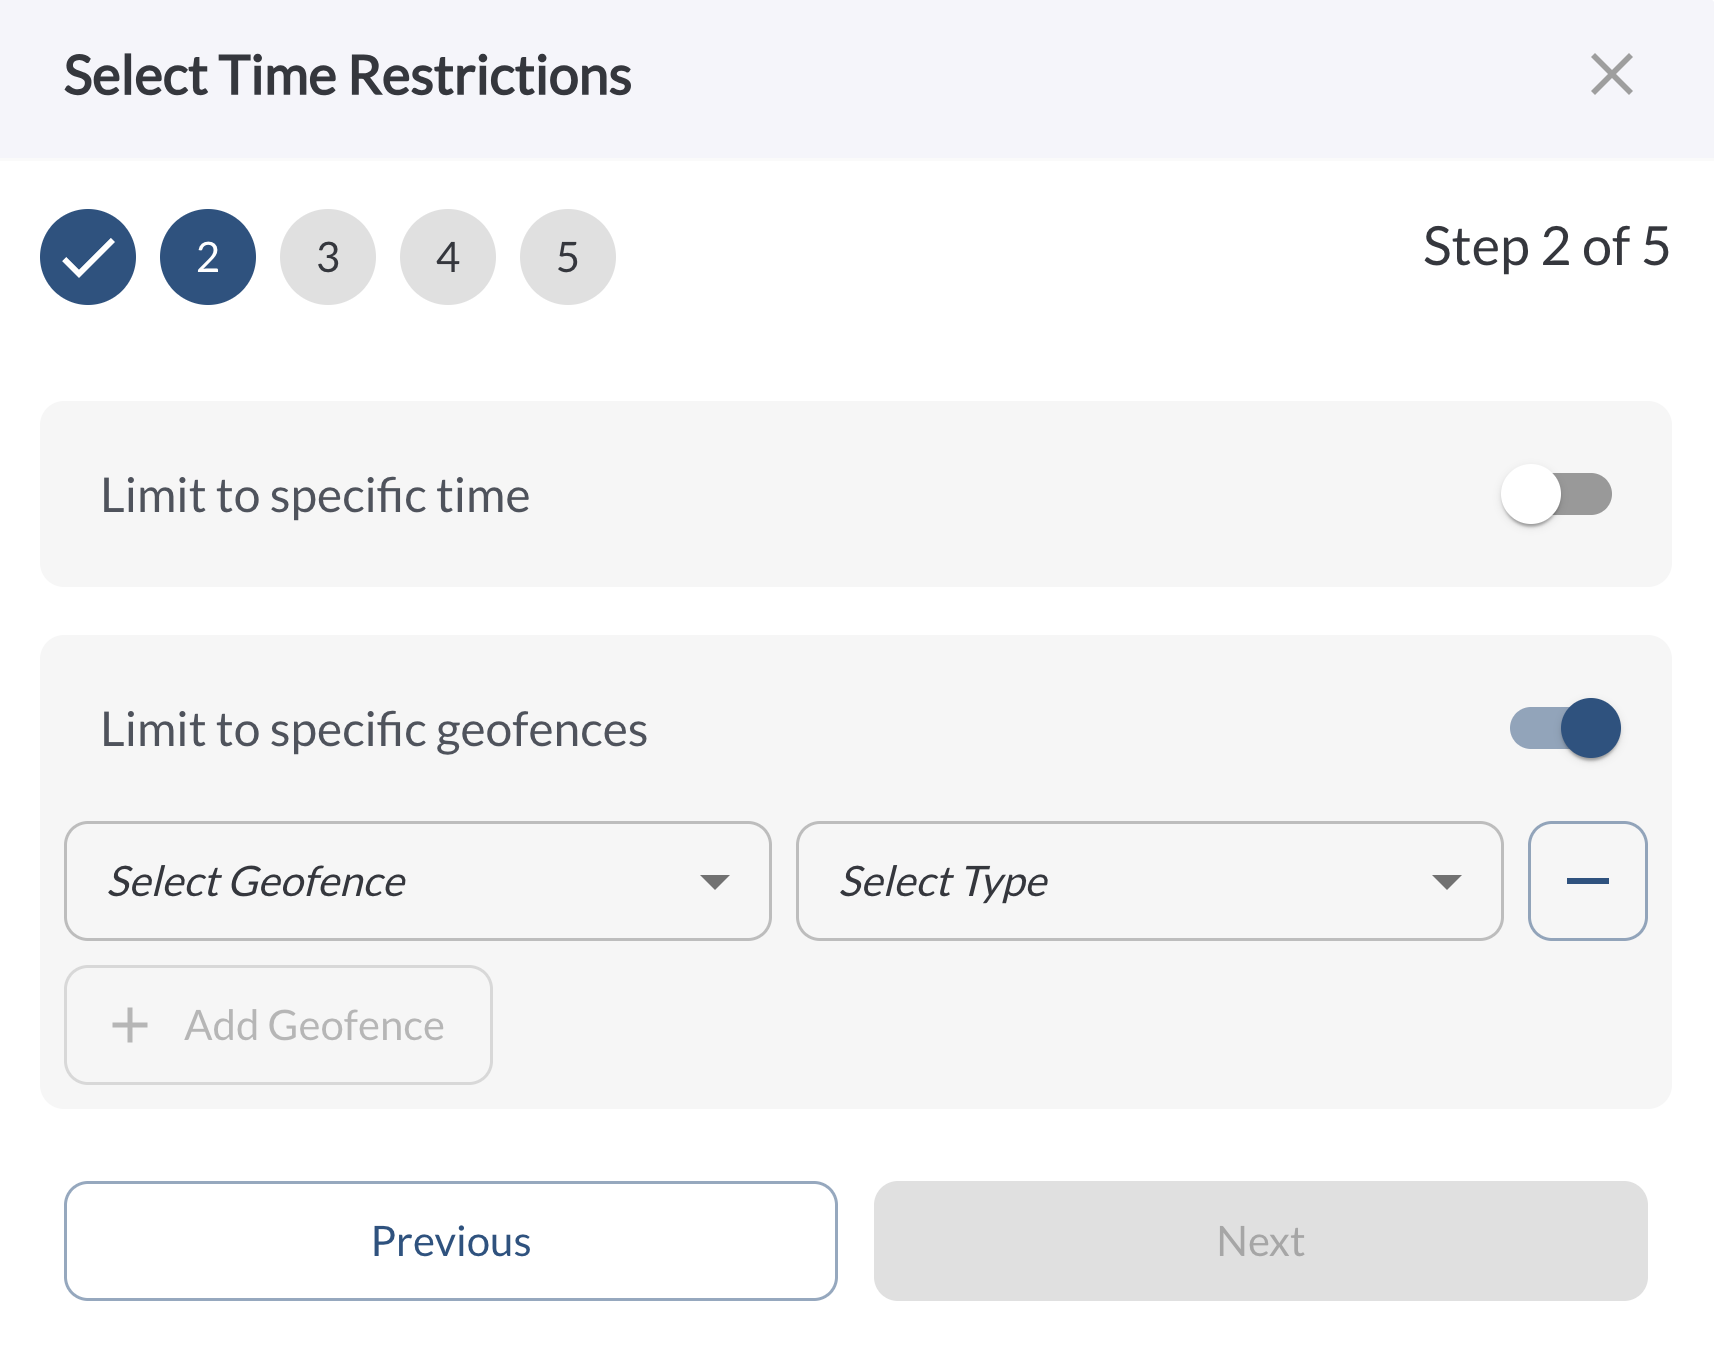
Limit to Specific Geofences - when enabled, this section allows you to restrict alerts to particular areas using your existing geofence list:
Select Geofence – Choose one or more geofences from the dropdown.
Select Type – Define whether the alert should trigger Inside or Outside the selected geofence.
Add/Remove Geofence Rows – Click the plus (+) or minus (–) icons to add or remove geofence conditions.
Tip
This is ideal for location-sensitive alerts like detecting movement
outside a job site or inside a restricted zone.
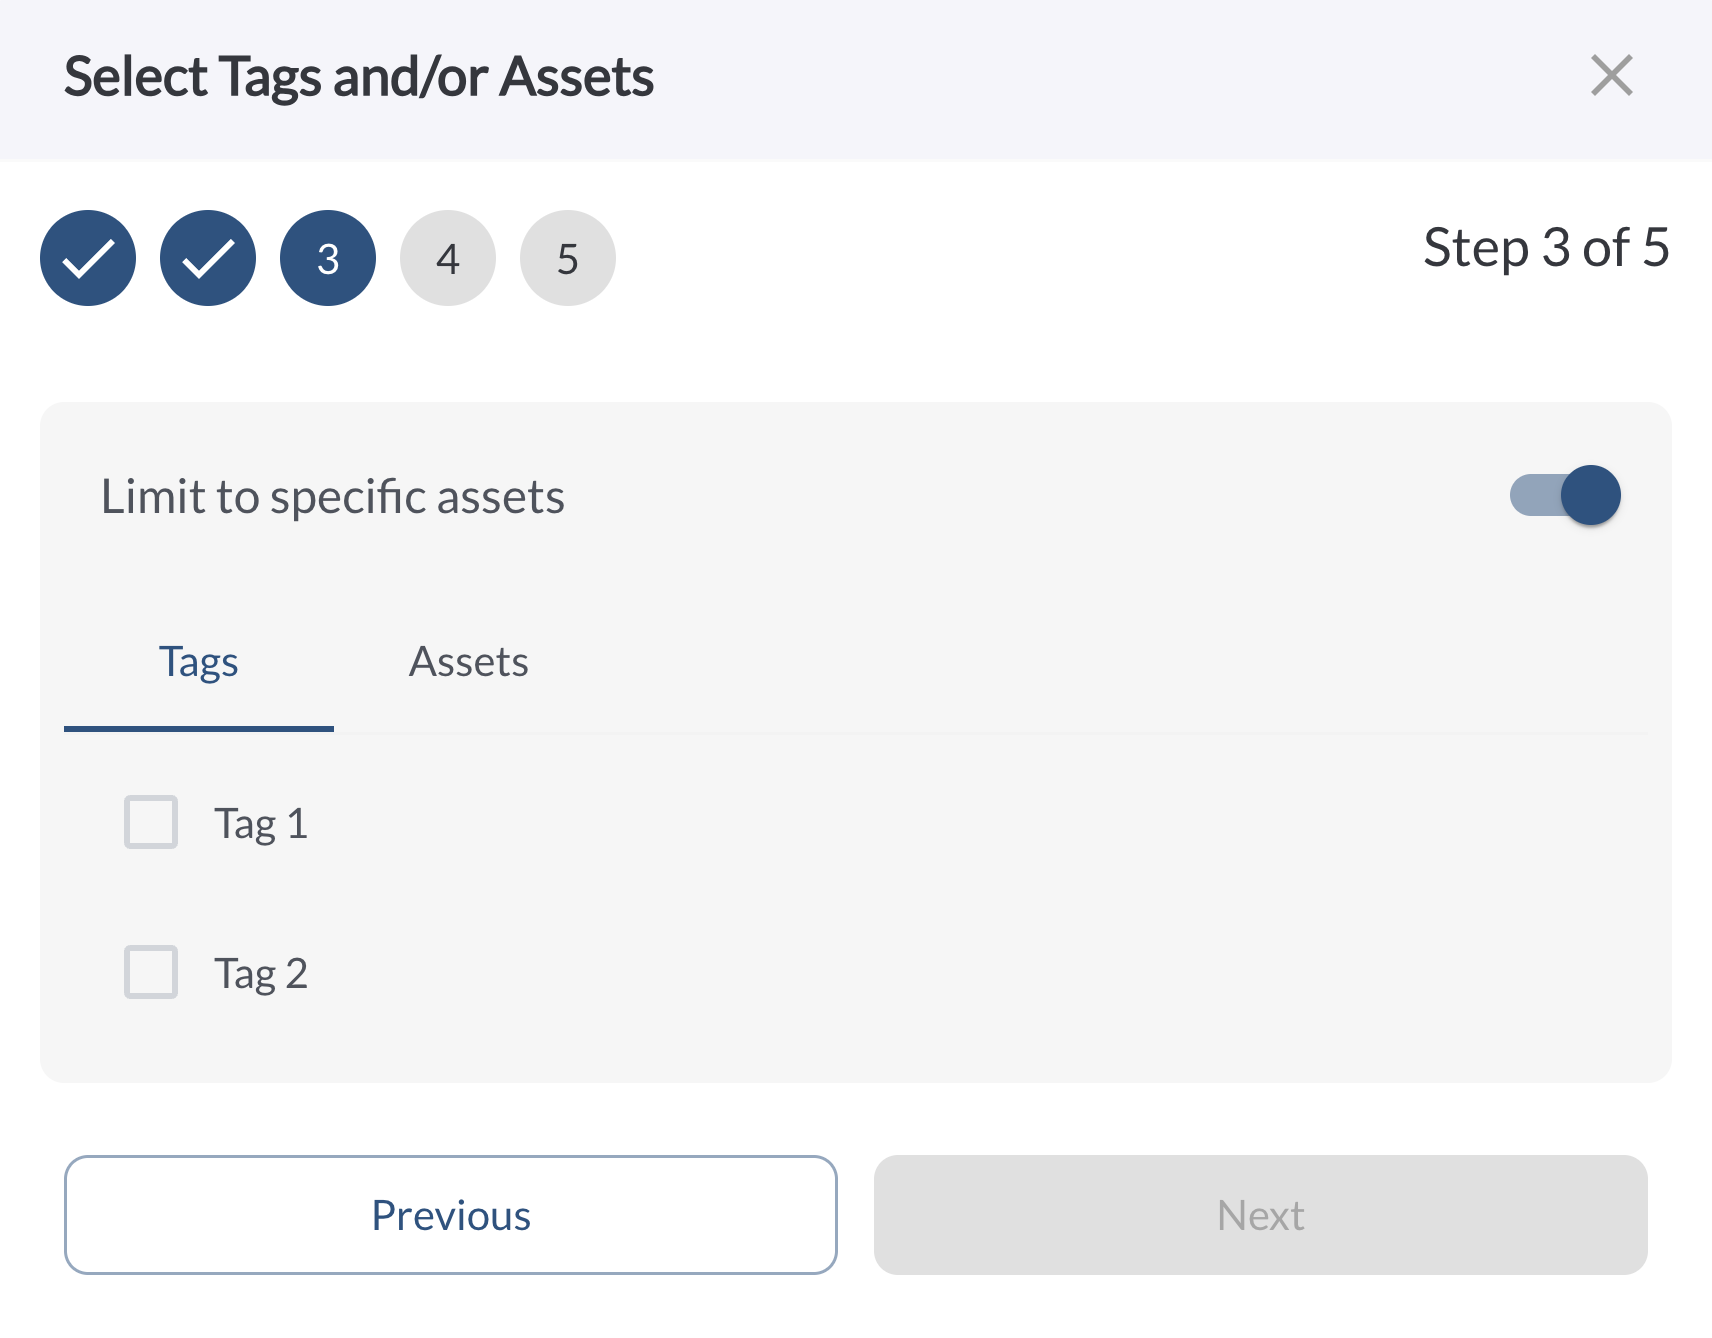
Step 3: Apply to Assets or Tags
In this step, choose which vehicles the alert applies to. You can select both tags and individual vehicles - the alert will apply to all of them. If you don't apply any filters in this step, the alert will be assigned to all vehicles in your fleet by default.
Note
When you select a tag, any new asset added to that tag in the future
will
automatically be included in the alert, so your rules stay up to date without manual updates.
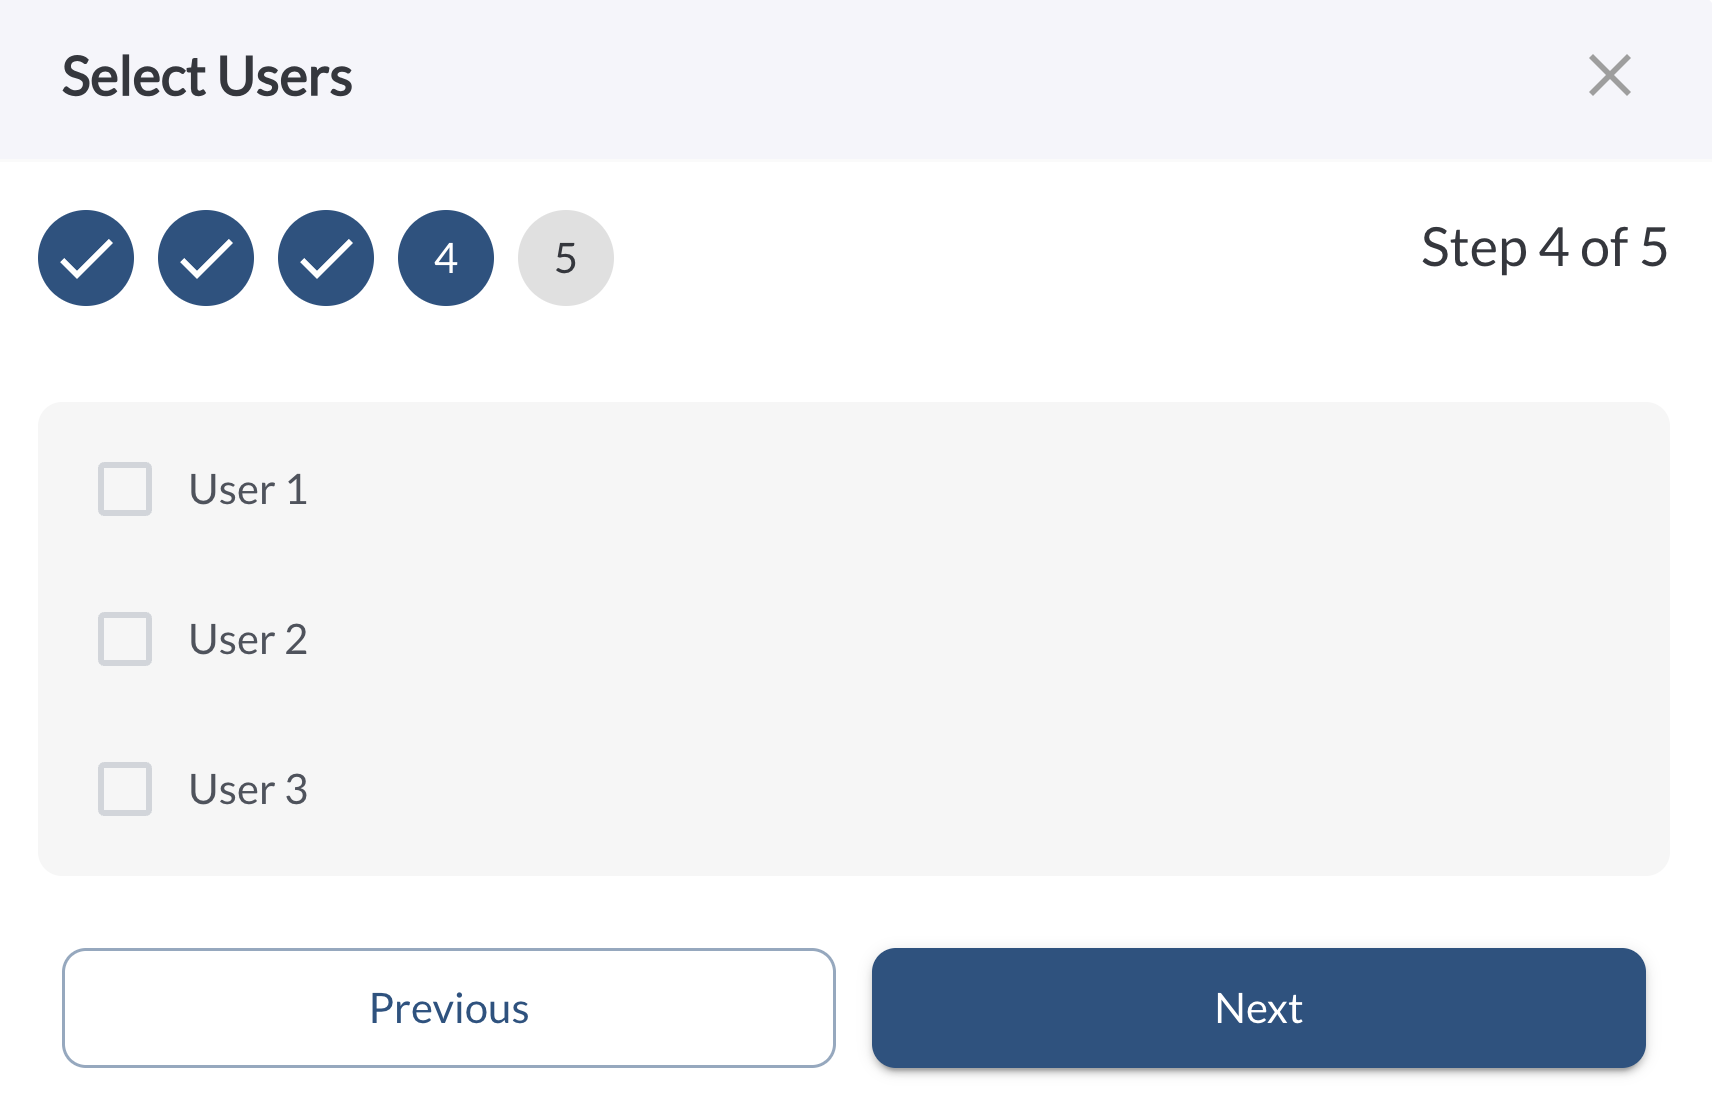
Step 4: Choose Alert Recipients
In this step, select one or more users who should receive the alert when it’s triggered. You’ll choose from your list of existing users
Step 5: Add Media
In the final step, choose whether to include an image snapshot when the alert is triggered:
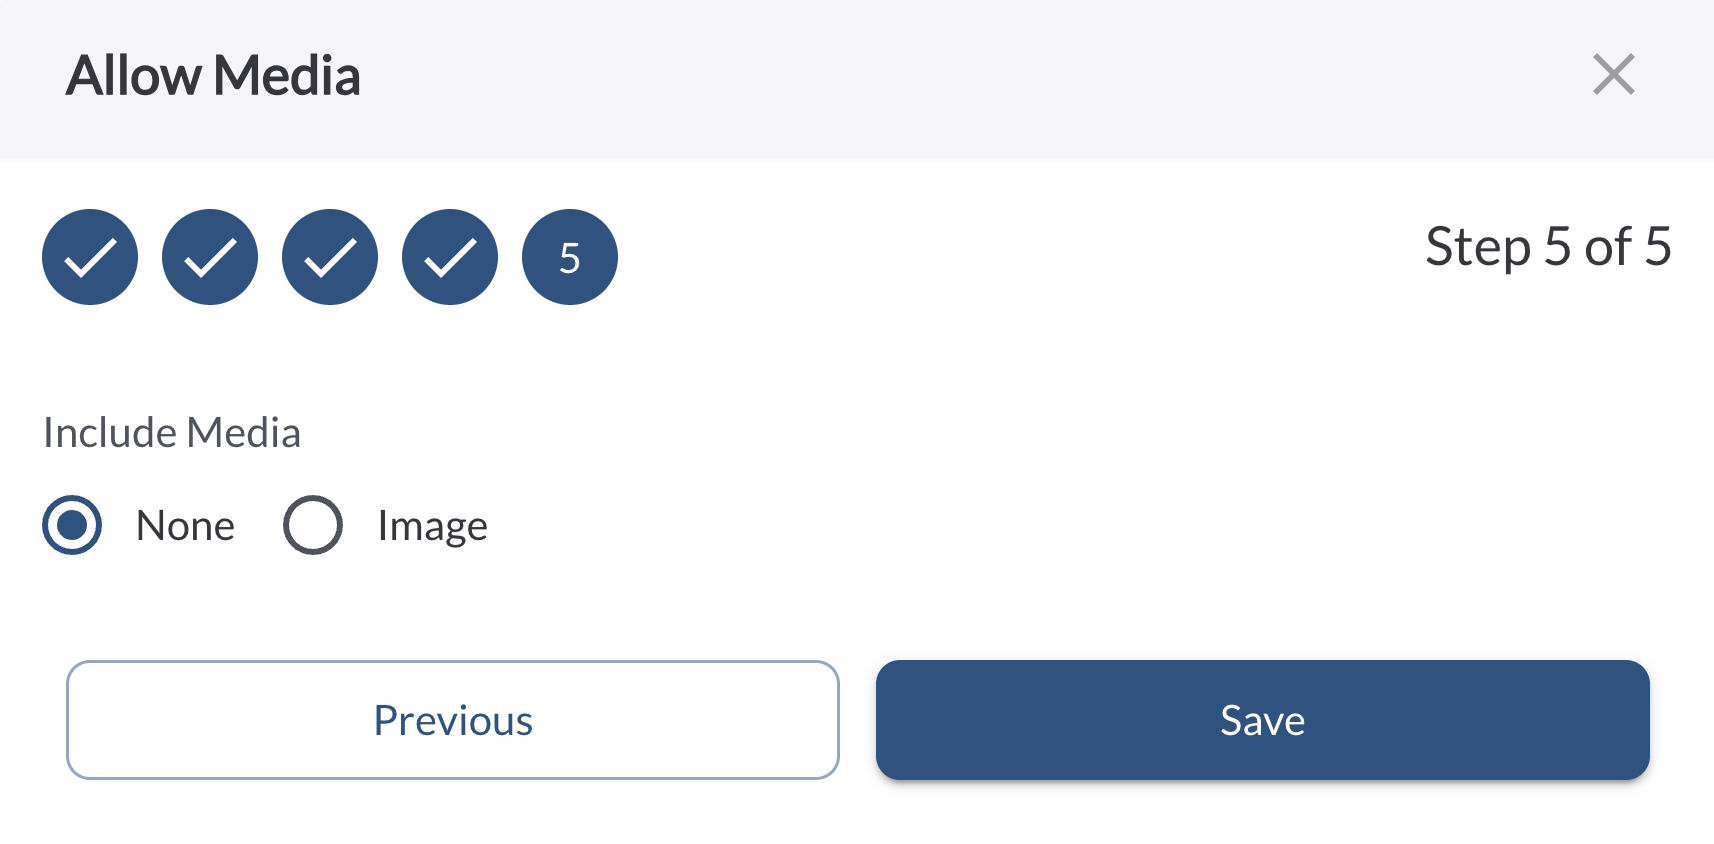
Note
Snapshot capture is only available for non-safety alerts. To configure
media
capture for safety-related alerts, see
Understanding Safety Events.
After completing all five steps, click Save. Your new alert will now appear in the Alerts tab.
How to Edit or Delete an Alert
Go to the Alerts tab.
Click the (⋯) menu next to the alert you want to update.
Select Edit to modify the alert using the same 4-step wizard.
Select Delete to permanently remove the alert.
Warning
Deleting an alert is a permanent action and cannot be undone.