Assigning a driver to a vehicle on the Map View is quick and straightforward. Follow these steps to easily assign or update a driver for any vehicle in your fleet.
Steps to Assign or Edit a Driver
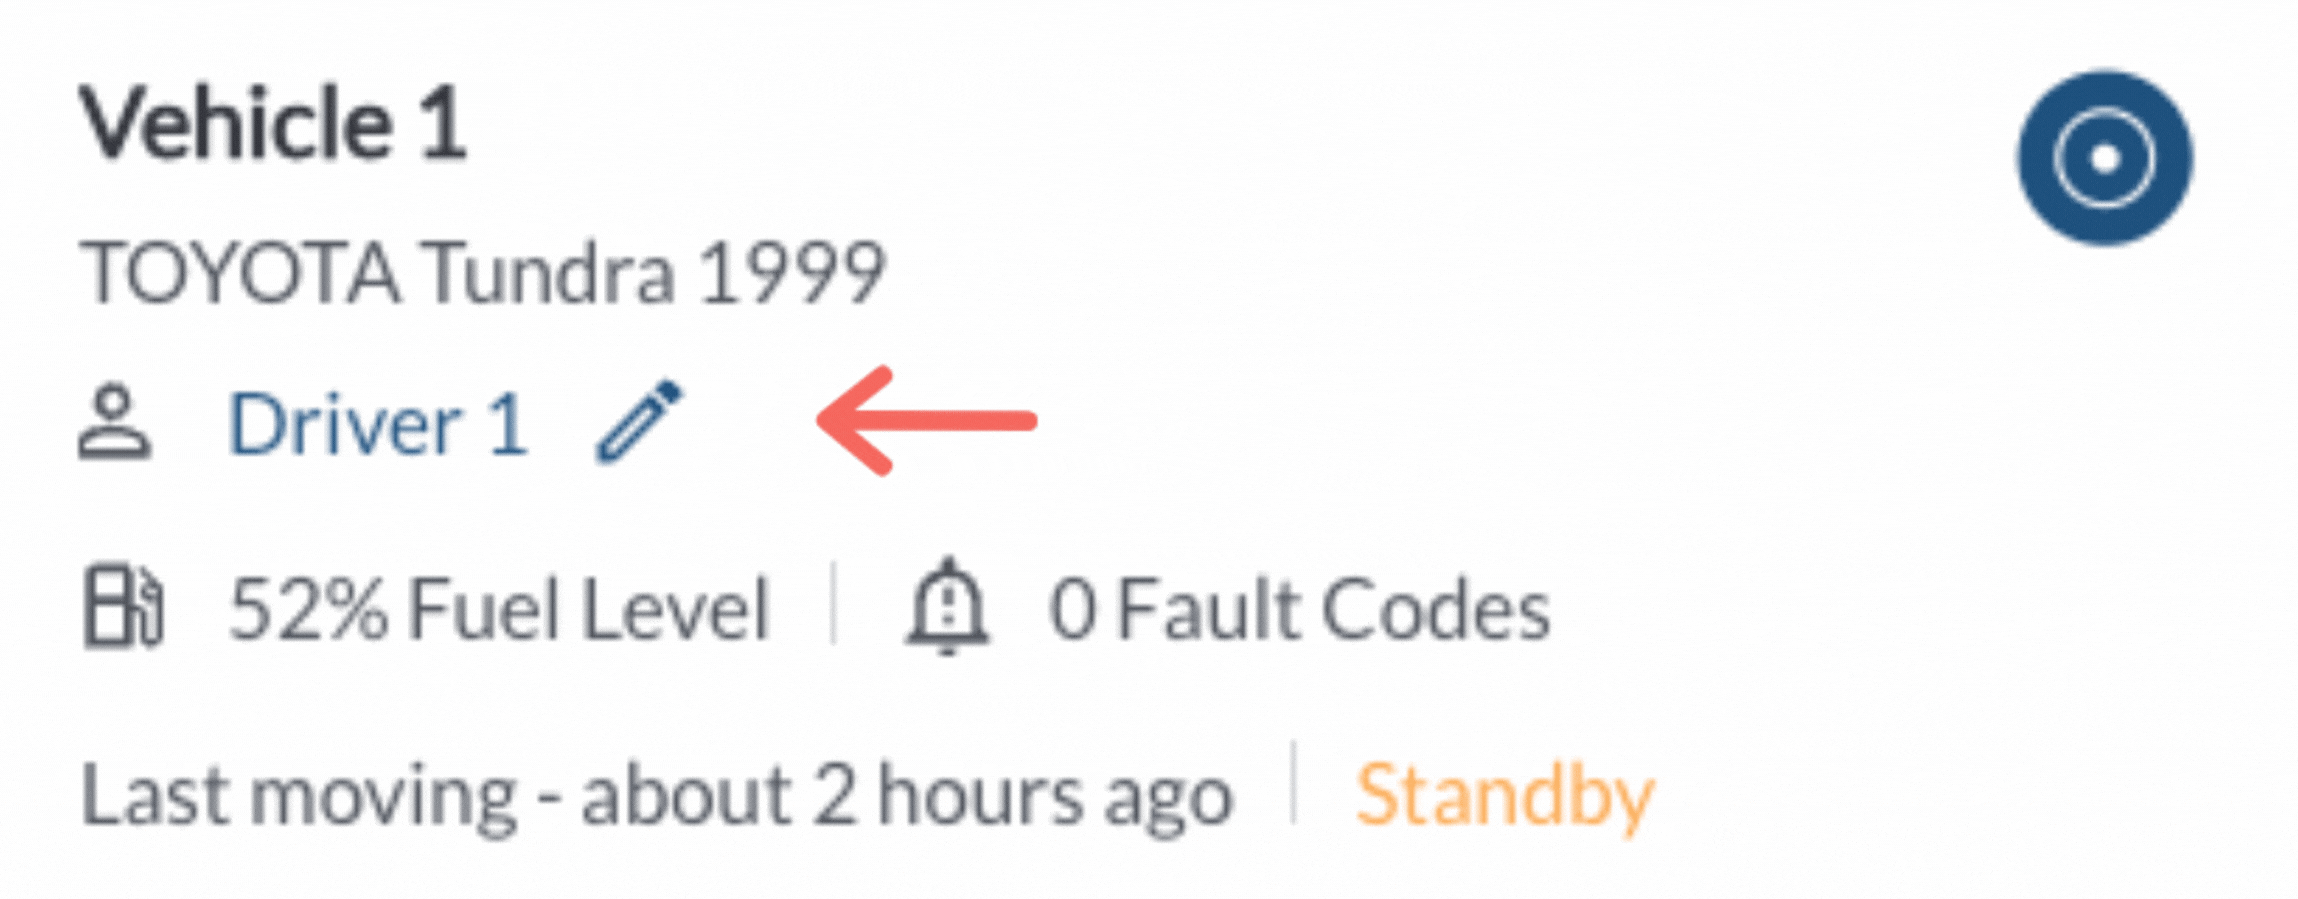
Assign a driver to a vehicle
- Navigate to the Vehicle List Panel on the left side of the Map View.
- Locate the vehicle in the Vehicle List Panel using the Search, Filter, or Sorting options; for more details, refer to the Map View Overview.
-
Click the Assign Driver Button to assign a driver to the vehicle
- A Dialog box will appear showing a dropdown list of all registered drivers in the system.
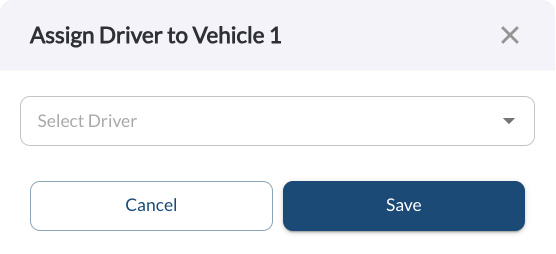
- Open the dropdown menu and choose the desired driver
- Click Save to confirm the assignment. The Dialog box will close and the update will apply immediately.
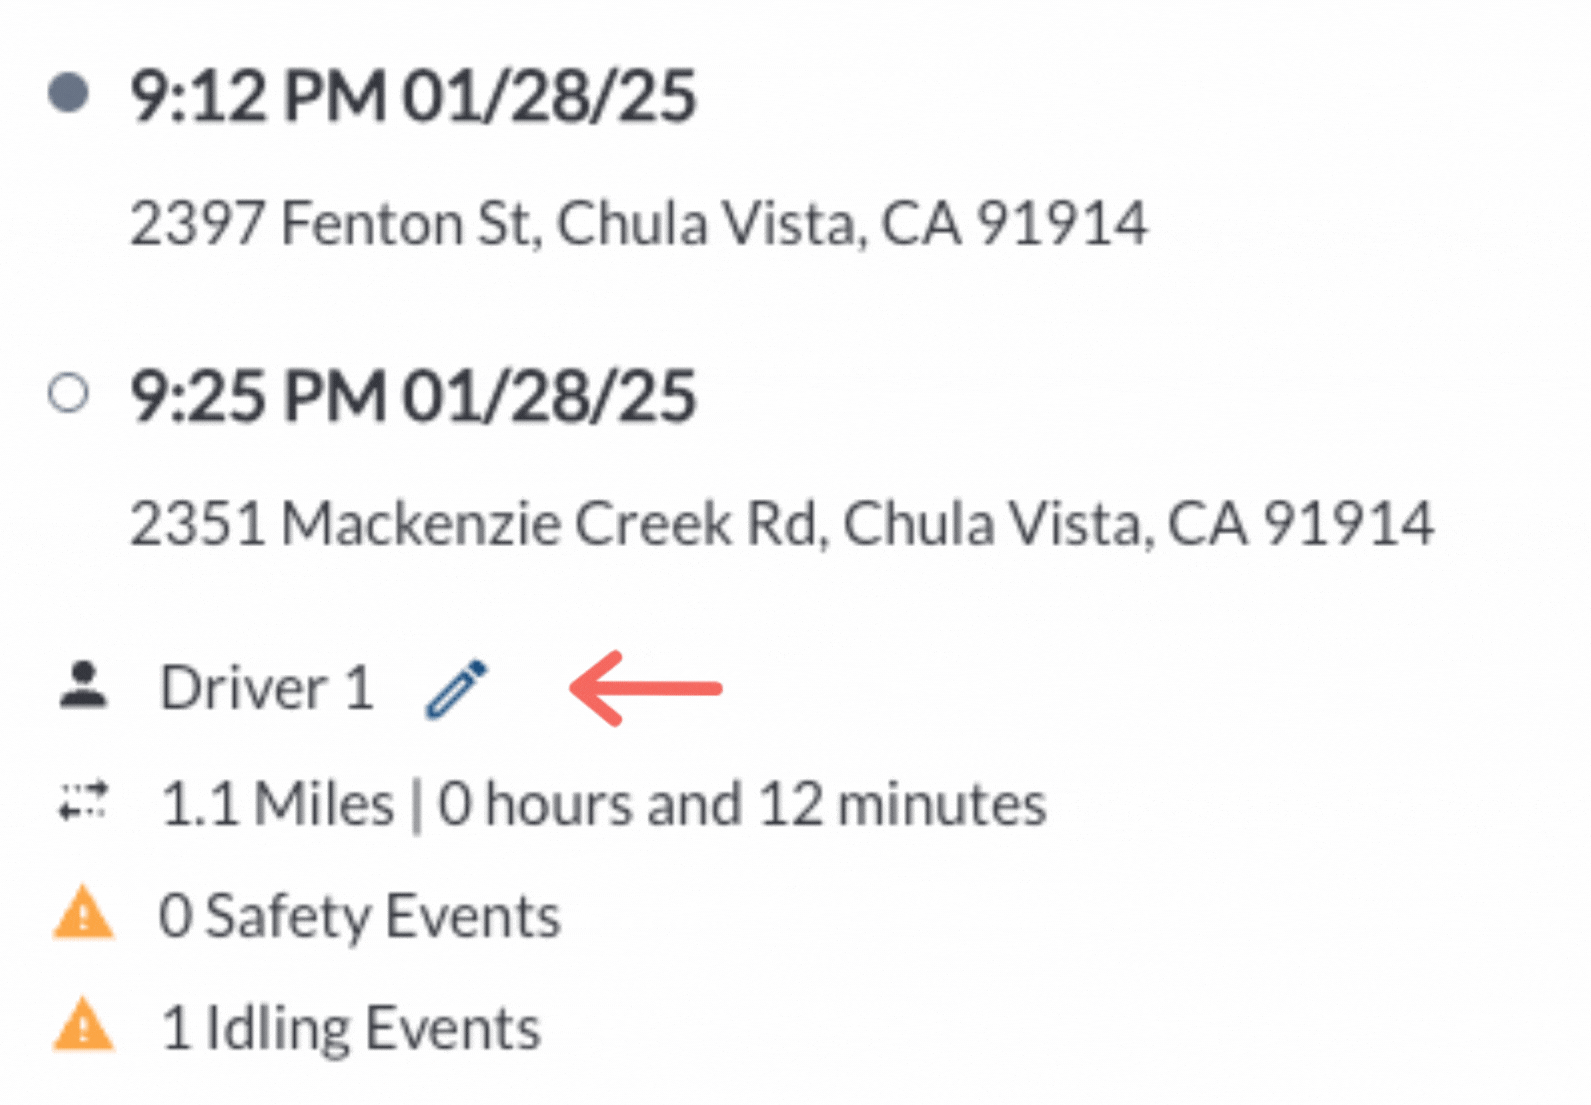
Assign a driver to a trip
- Navigate to the Vehicle Trips Panel to assign a driver to a specific trip
- Locate the trip in the Vehicle Trips Panel
- Click the Assign Driver Button to assign a driver to the trip
- A Dialog box will appear showing a dropdown list of all registered drivers in the system.
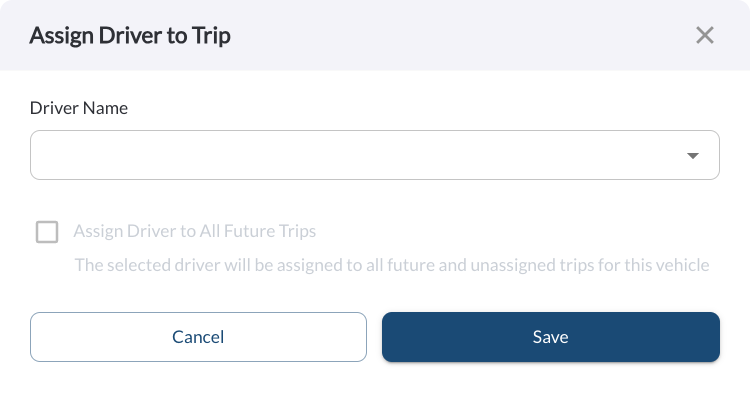
- Open the dropdown menu and choose the desired driver
- Check the box if you want to assign the driver to all future trips and unassigned trips for this vehicle.
- Click Save to confirm the assignment. The Dialog box will close and the update will apply immediately.
Note
Ensure the driver is already registered in the system before attempting
to
assign them. If a driver is not listed in the dropdown, you can add them
through the Drivers page. For instructions on adding drivers, refer to
the
article
How to Add or Edit Drivers.