The Recordings page offers a user-friendly interface for viewing and managing video footage captured by your fleet's devices. It is divided into two main sections: the Device List and the Video Player with Timeline.
Vehicles List Panel
The Vehicles List Panel allows you to locate and select devices to access their recordings.
1. Search Vehicles
Quickly locate specific vehicles using the Search bar at the top of the Vehicles List Panel. Enter a vehicle name, and the list will update dynamically to display matching results

2. Filter Vehicles
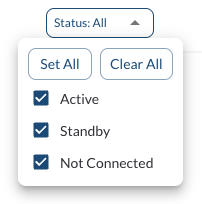
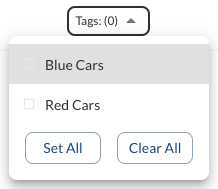
Use the Filter option at the top of the Vehicles List Panel to adjust the displayed vehicles and focus on specific groups.
-
Filter by Status: Narrow down the Vehicle List Panel based on the status of devices (e.g., active, standby, or not connected). For more details, refer to the article Understanding Device Statuses.
-
Filter by Tag: Display vehicles associated with specific tags for easier management. To learn more about setting up and using tags, see the article Tags Settings.
3. Sort Vehicles
Locate the Sort button above the Vehicles List Panel and click it to toggle between alphabetical (A-Z) and reverse alphabetical (Z-A) sorting options, with the list updating dynamically to reflect your selection.


4. Displayed Information
Each row in the device list includes:
| Name |
The name of the vehicle |
| Last Moved |
The last time the device recorded movement |
| Status |
The current status of the device (e.g., active, standby, not connected) |
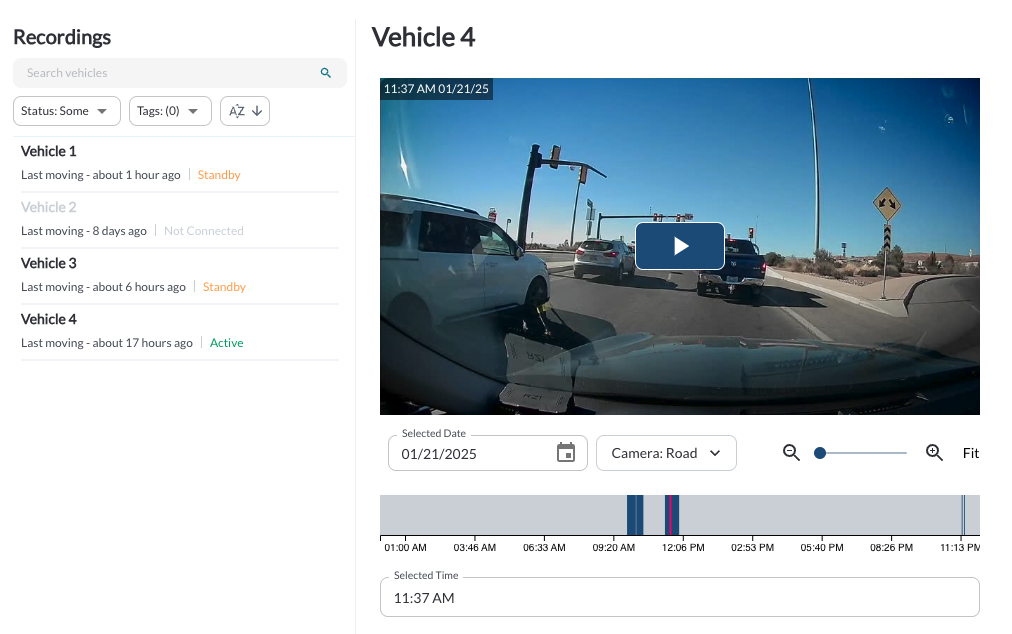
Video Player and Timeline
The Video Player and Timeline section provides tools to stream, navigate, and interact with recordings from your selected device.

1. Streaming and Playback
The video player streams footage directly from the selected device, provided the device is Active. If the device is in Standby mode, clicking on it will send a wake-up command to activate it. Devices that are not connected cannot fetch recordings. For more details on device statuses, refer to the article Understanding Device Statuses.
30-second segments by default: Videos are streamed in 30-second chunks.
Next and Back buttons: Use the Next and Back buttons to load the following or previous 30 seconds of recording.
Playback features: Adjust playback speed, download footage, and view in full screen. For details, see How to Use the Video Player.
Bottom overlay information: Displays key data such as current GMT time, device IMEI, speed, and GPS coordinates to ensure accurate context for every recording.
Rotation: Rotate the camera feed in 90° increments directly in the video player to correct for the physical mounting angle of the camera.
Flip Horizontal: Mirror the camera feed horizontally directly in the video player to correct for cameras mounted in reverse.
Note
Orientation adjustments made in the video player apply to the current
viewing session only. To set a permanent orientation for a camera, update
the configuration in the vehicle's Camera tab in Asset Configuration.
2. Using the Timeline
The timeline provides an efficient way to navigate and interact with recordings for a specific date and time. By default, the timeline is set to Today, and the selected time defaults to the first available recording on that date.
The timeline allows you to easily navigate and interact with recordings for a specific date and time. By default, it is set to Today, with the selected time defaulting to the first available recording of the day. The timeline also allows configuration options, enabling you to customize your view and interaction preferences:
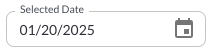
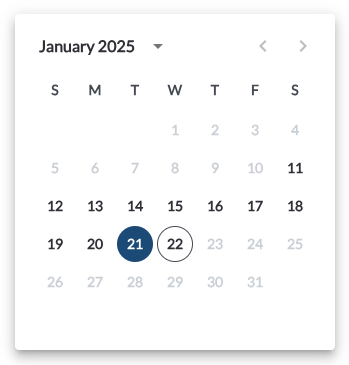
Changing the Date
- Click on the Date field above the timeline to open the calendar.
-
Select the desired date, keeping in mind that only one day can be selected at a time.
-
Changing the Time
-
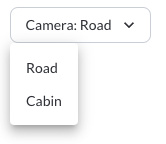
Changing the Camera
Recordings can be viewed from the Road, Cabin, or any connected Auxiliary cameras. By default, playback starts with the Cabin camera view. To switch between available camera angles, use the camera selection dropdown above the timeline. This allows you to review the event from multiple perspectives when more than one camera is enabled.
-
Zooming the Timeline
The timeline offers intuitive zoom controls to focus on specific periods:
- Adjust the view to zoom in for more granular details or zoom out for a broader overview.
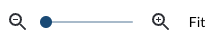
- Adjust the view by zooming in for finer details or zooming out for a wider perspective. To zoom in, simply scroll over the timeline.
