The Users tab allows administrators to manage user accounts and permissions within the system. This section ensures that users have the appropriate access and settings to perform their roles effectively.

Users Table
The table displays all registered users, allowing you to efficiently organize and access user details. It supports downloading, sorting, filtering, resizing columns, and other customization options. For a complete guide, refer to the article How to Use Table Options.
The table includes the following columns, each providing specific user information:
| Email |
The user’s email address |
| Name |
The user’s name |
| Roles |
The access level assigned to the user. Roles can be built-in or custom:
-
Built-in roles: Admin, Manager, User, Installer
-
Custom roles: Roles created by your organization with tailored permissions. To learn more, see Roles & Permissions.
|
| Created Date |
The date the user was created |
| Login Details |
Displays how long it has been since the user last logged in |
| Tags |
Tags assigned to the user to control which assets and data they have visibility over |
Add or Edit a User
The Add or Edit User functionality allows administrators to create new user profiles or update existing ones, ensuring accurate access levels and up-to-date information.
Add User
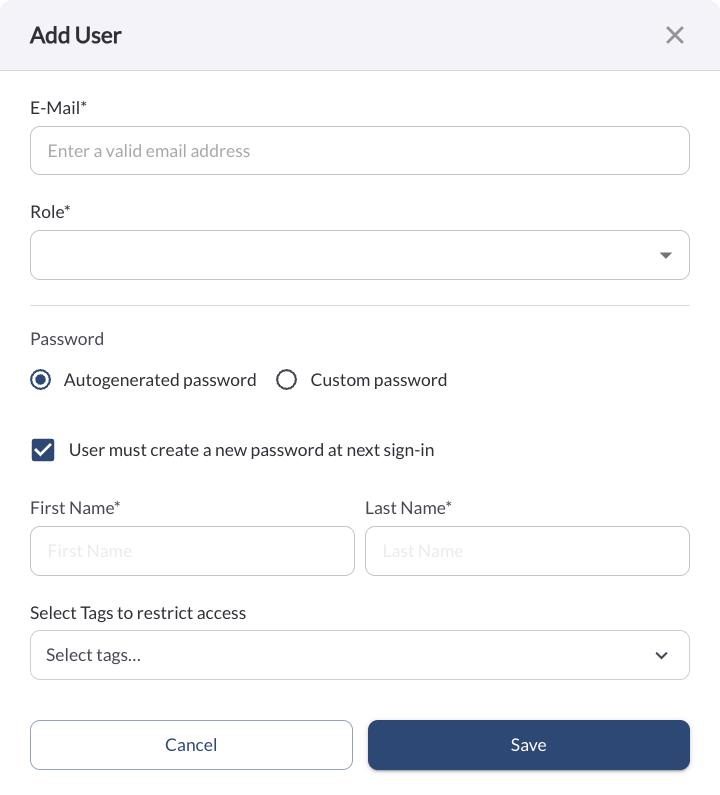
Click the + Add User button at the top right of the page to create a new user. The form includes the following fields:
-
First Name – The user's first name
-
Last Name – The user's last name
-
E-Mail – The user's email address, used as their login. (Required)
-
Role – Assign a role to the user. You can select from any available built-in role (Admin, Manager, User, Installer) or any custom role created for your organization. (Required)
-
Tags – Assign one or more tags to control which assets and data the user has visibility over. Users will only see assets and drivers that share the same tags. If no tags are assigned, the user will have visibility over all assets and drivers.
Note
When a new user is created, they will automatically receive a welcome
email containing a one-time password. On their first login, they will
be prompted to set a new personal password.
Edit User
Click the (⋯) menu next to an existing user and select Edit to update their details. The form includes the following fields:
-
First Name – Update the user's first name
-
Last Name – Update the user's last name
-
E-Mail – Update the user's email address. (Required)
-
Tags – Update the tags assigned to the user.
Quick Action Menu
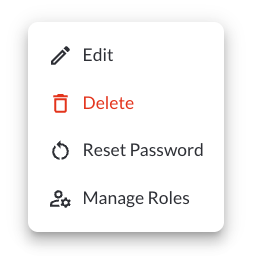
1. Edit a User
Opens an interface where you can configure the user's settings initially set during their creation. For more information, refer to the guide Add and Edit a User.
2. Delete a User
Permanently removes the selected user from the system.
Warning
Deleting a user is a permanent action and cannot be undone.
3. Reset Password
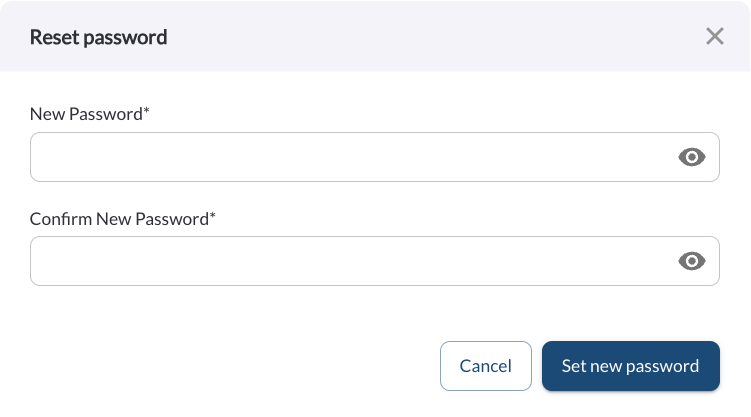
Allows administrators to securely update a user’s login credentials. Clicking the Reset Password button opens a popup where you can enter and confirm a new password, which takes effect immediately.
4. Manage Roles
Opens the Manage Roles panel for the selected user, allowing you to assign or change the user's global role. You can select from any available built-in role (Admin, Manager, User, Installer) or any custom role created for your organization. To learn more, see Roles & Permissions Settings.
Adding Users in Bulk
The bulk upload feature allows you to add multiple users to the Fleet Portal at once using a CSV template. This eliminates the need to create users one by one and saves time when setting up access for large teams.
How to Upload Users in Bulk
- Navigate to the Users page in the Fleet Portal.
- Click the Add Multiple Users button.
- Fill in the template with your user details.
- Upload the completed file and click Submit.
Template Fields
| Field |
Description |
| email |
The user's email address |
| firstName |
The user's first name |
| lastName |
The user's last name |
| password |
The user's initial password |
| role |
The role assigned to the user (e.g., Admin, Viewer) |
Note
Always use the provided template when uploading users in bulk. Uploading
a file with missing or incorrectly formatted columns may cause the upload
to fail.