Tag-based access restriction allows Admins to control what data Managers and Users can see and manage in RoadEazy. By assigning tags to users, you ensure they only interact with the vehicles, drivers, trips, and recordings that match their tags.
How Tag Restrictions Work
- When creating or editing a user, an Admin assigns one or more tags.
- Once the user logs in, their view is restricted to data that matches their tags. This applies across all modules: vehicles, trips, drivers, events, recordings and more.
- If a user has multiple tags, they will see data for all of those tags combined.
- If a user has no tags assigned, they will see all data in the account.
- When filtering by tags, a user can only filter using the tags assigned to them.
Warning
If you forget to assign tags, the user will automatically see all data
in
the account.
Tip
Use consistent tag naming (e.g., by branch, region, department, or asset
type) to make management easier. Learn more →
Tags Settings.
Example Scenarios
- A Manager with the tag “East Branch” will only see vehicles, trips, and drivers from the East Branch.
- A User with the tags “California” and “Refrigerated” will see only refrigerated trucks in California.
- A User with no tags will see the entire fleet across all regions and types.
Guide for Admins: Assigning Tags
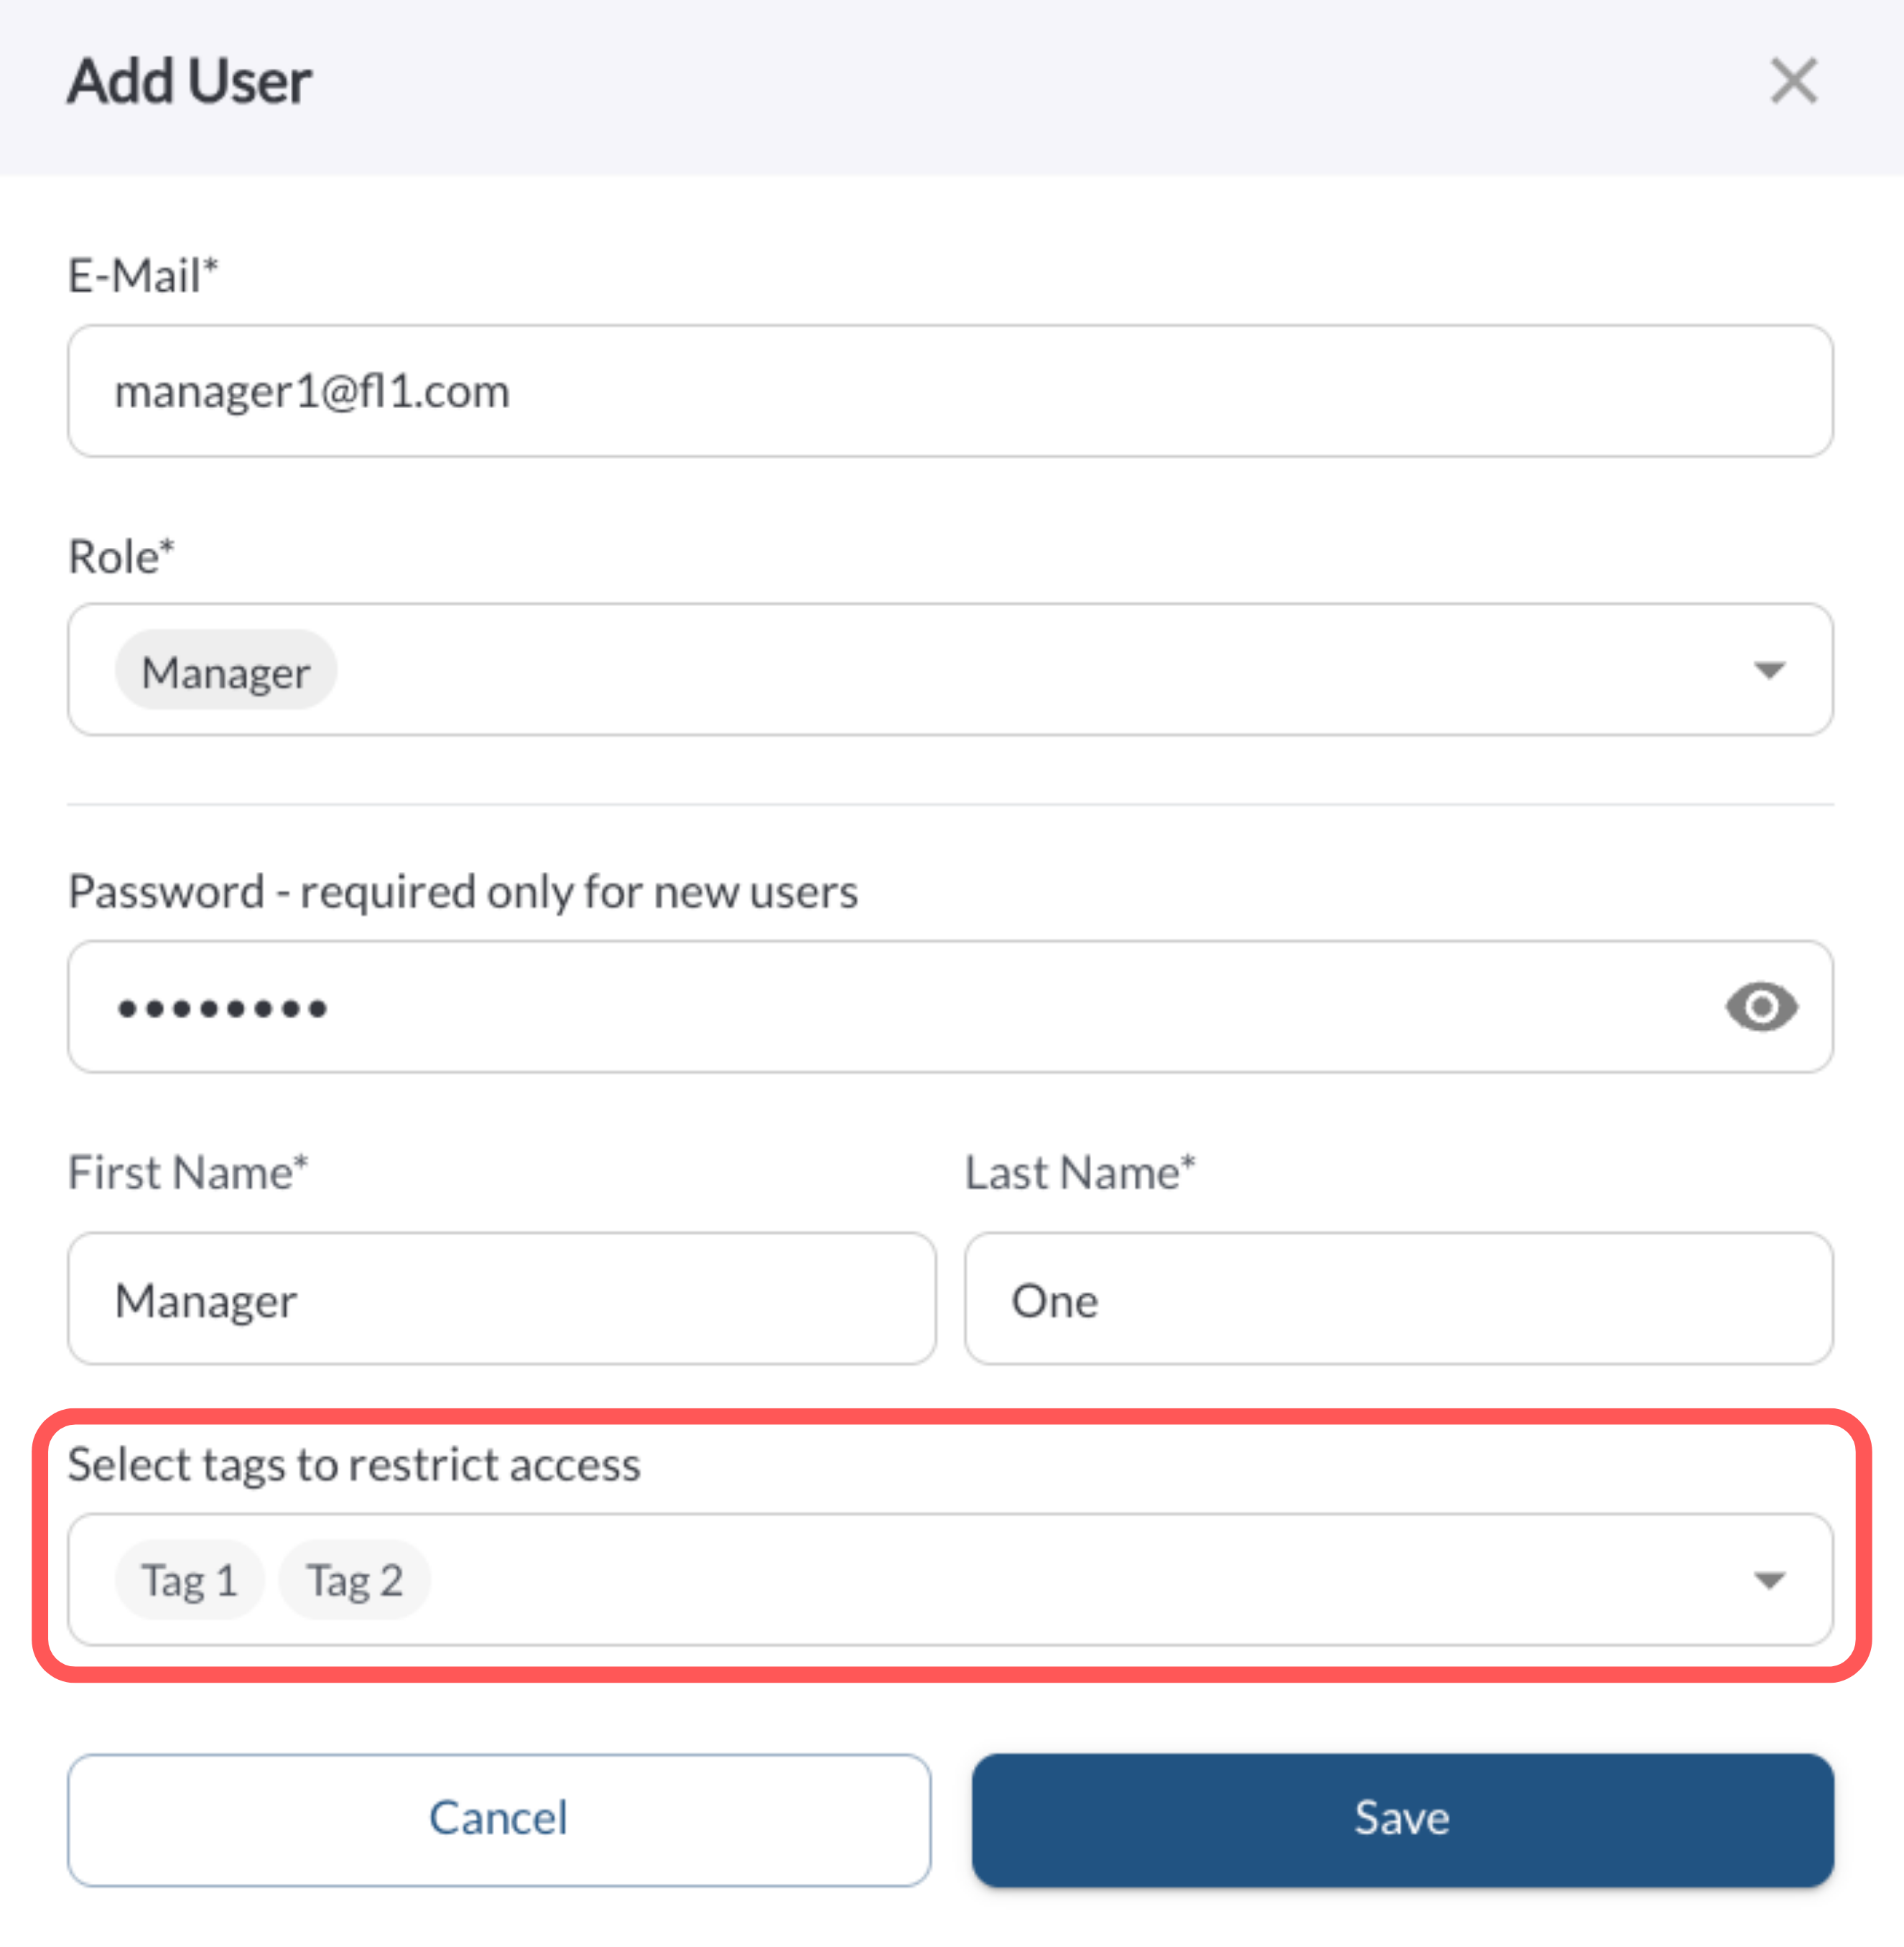
Create a new user with tags
- Go to Settings > Users.
- Click Add User.
- Fill in the user details (name, email, role).
- In the Tags field, select one or more tags.
- Click Save.
Edit an existing user’s tags
- Go to Settings > Users.
- Find the user and click Edit.
- In the Tags field, adjust their assigned tags:
- Add tags to expand access.
- Remove tags to restrict access.
- Click Save.