This guide explains how to install the RZ1 Vehicle Hub using the Hardwire 2-Wire Kit. This installation method provides constant 12 V power to the hub, ensuring the device remains powered even when the ignition is off.
1. Gather the Kit and Tools
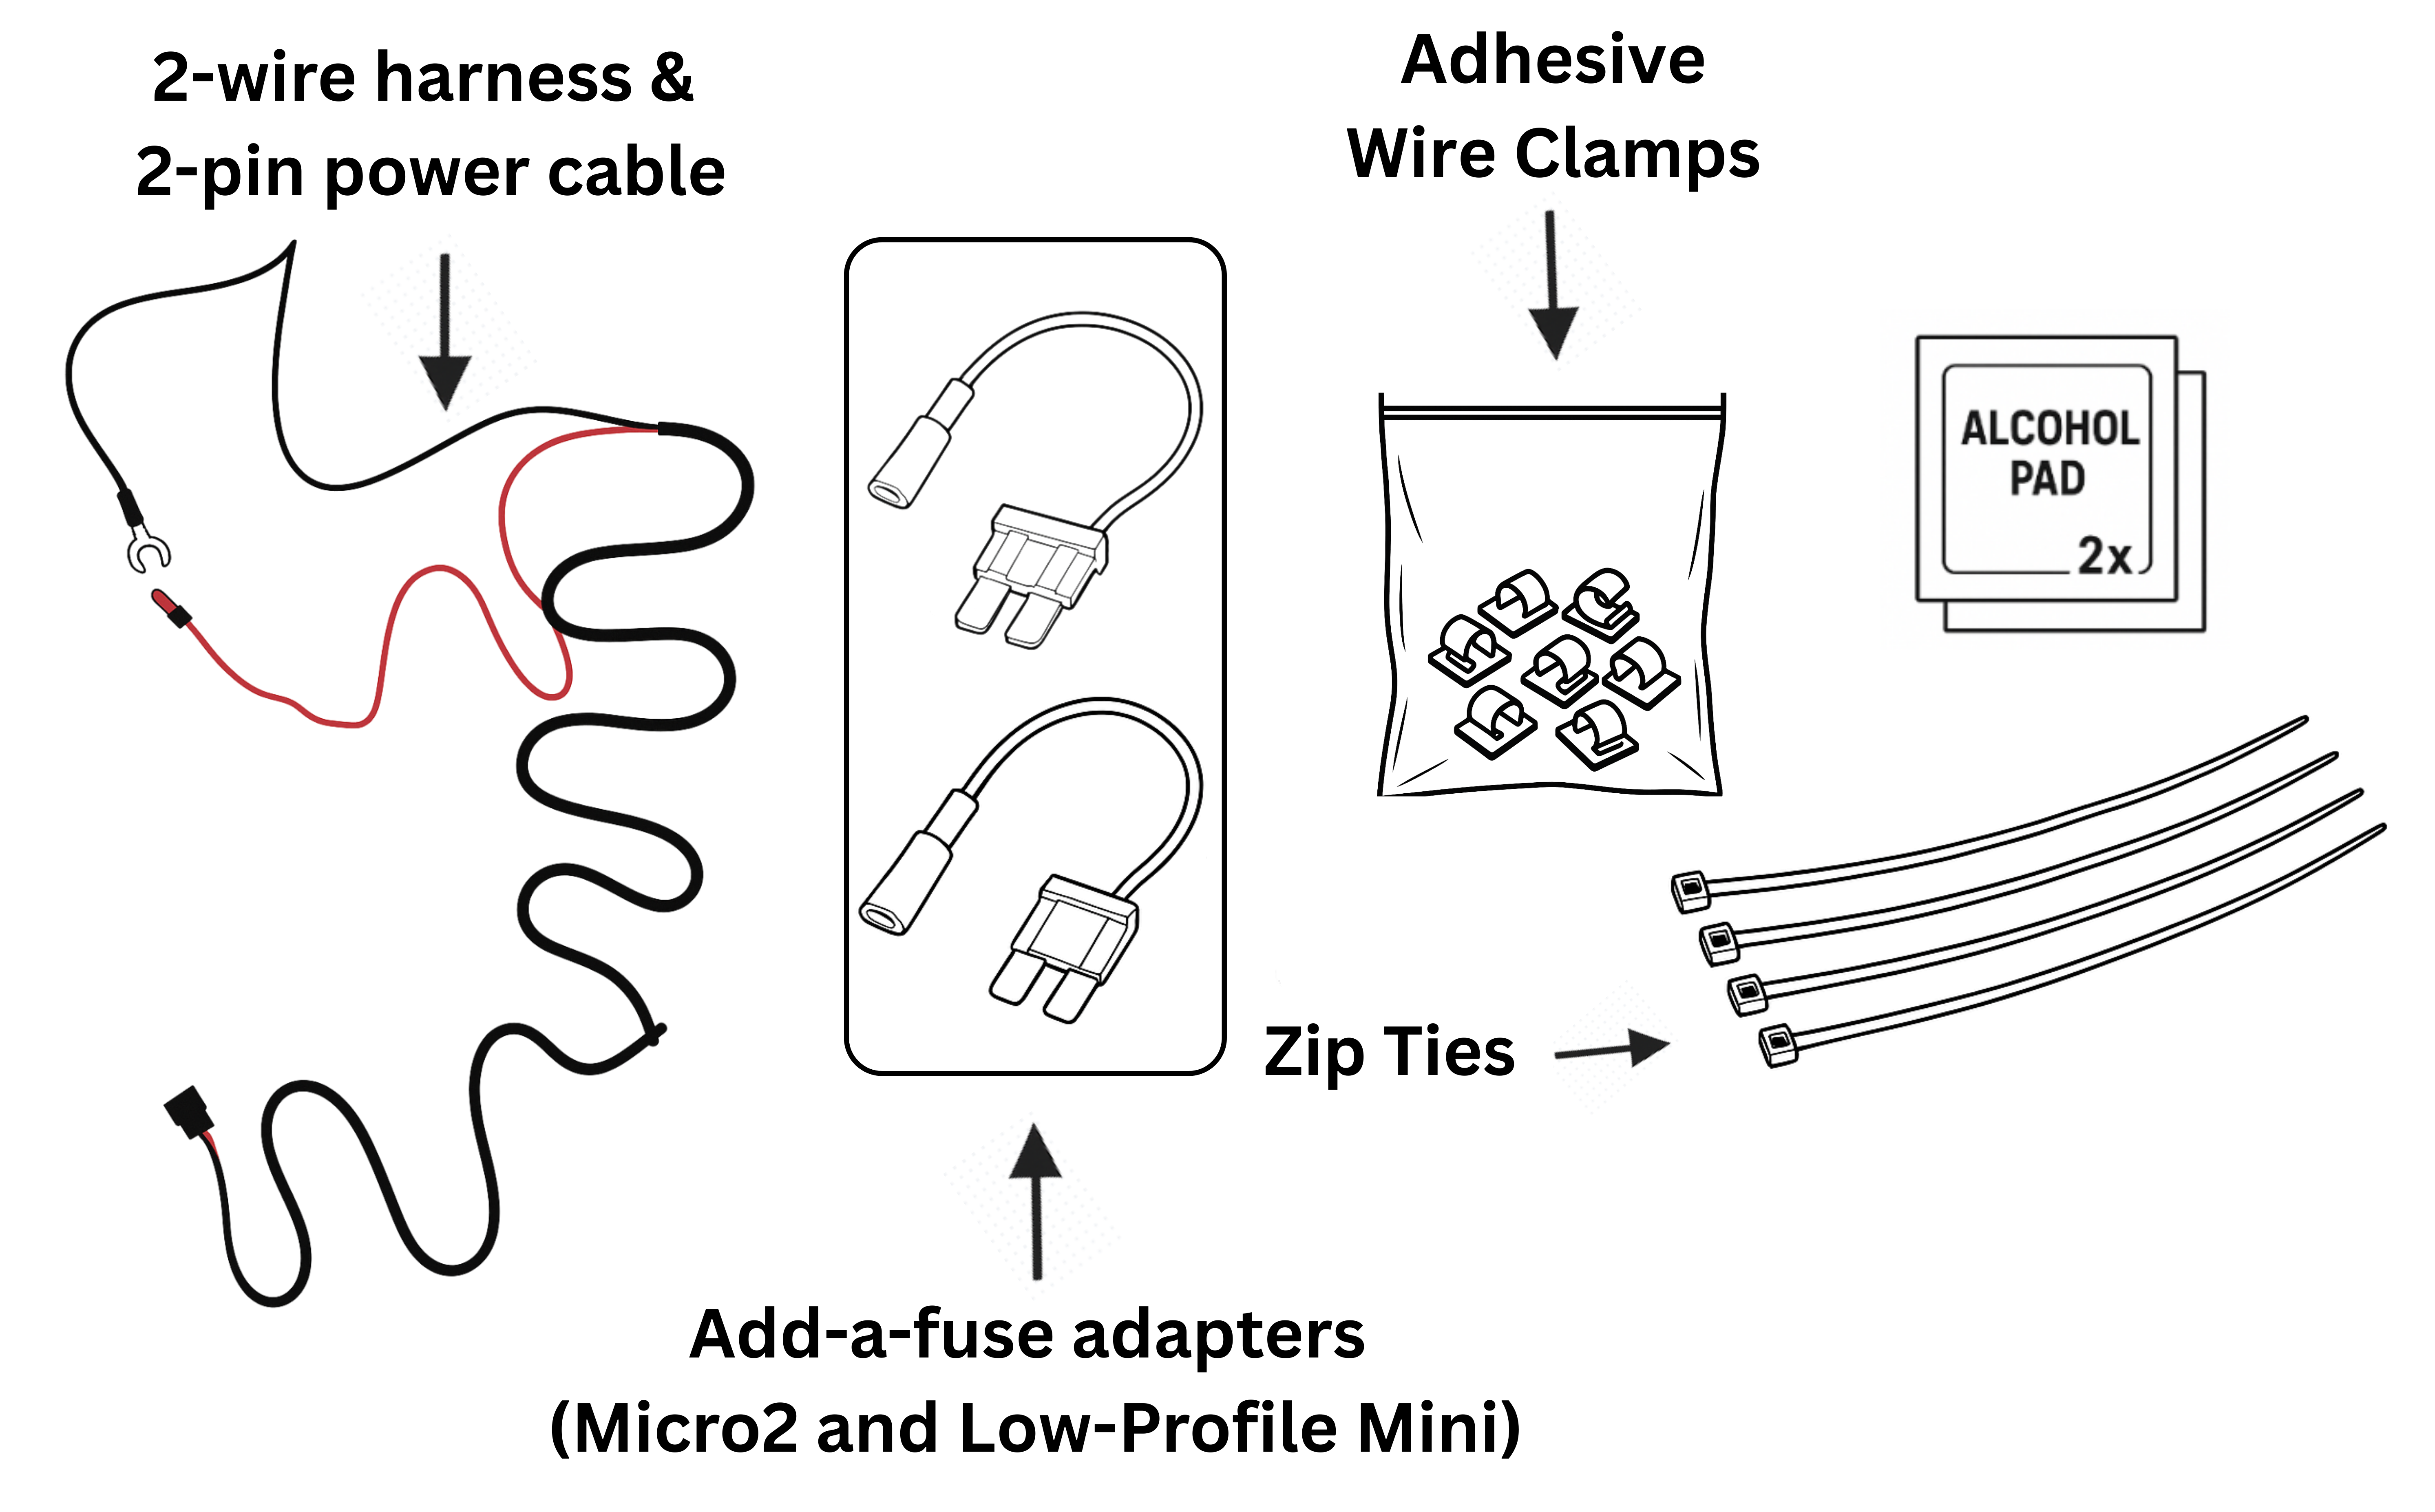
Before starting, confirm you have the following components and tools:
- 2-wire harness (red = power, black = ground)
- Add-a-fuse adapters - the kit includes two types of fuse adapters:
- 2-pin power cable for the hub
- Zip ties
- Adhesive wire clamps
- Alcohol wipes
Note
A multimeter is recommended to confirm the selected fuse box slot provides constant 12V power.
Tip
Choose the correct fuse adapter based on your vehicle’s fuse type.
2. Prepare the Vehicle
Park the vehicle on a flat, safe surface and turn ignition OFF.
(Recommended) Disconnect the negative battery terminal to prevent accidental shorts during wiring.
Identify clean, flat surfaces under the dash where adhesive wire clamps can be applied. Use alcohol wipes to clean these areas for better adhesion.
3. Locate the Fuse Box
Most vehicles have the main fuse panel under the driver’s side dashboard. Consult the owner’s manual if unsure.
Identify a fuse slot that provides constant 12 V power and stays live even when the vehicle is turned off.
If you have a multimeter, use it to confirm the slot is delivering constant voltage. This step can help avoiding accidentally choosing an ignition-switched circuit.
Tip
Common fuse box slots that usually provide constant 12V power include the dome light, hazard lights, and seat adjustment circuits.
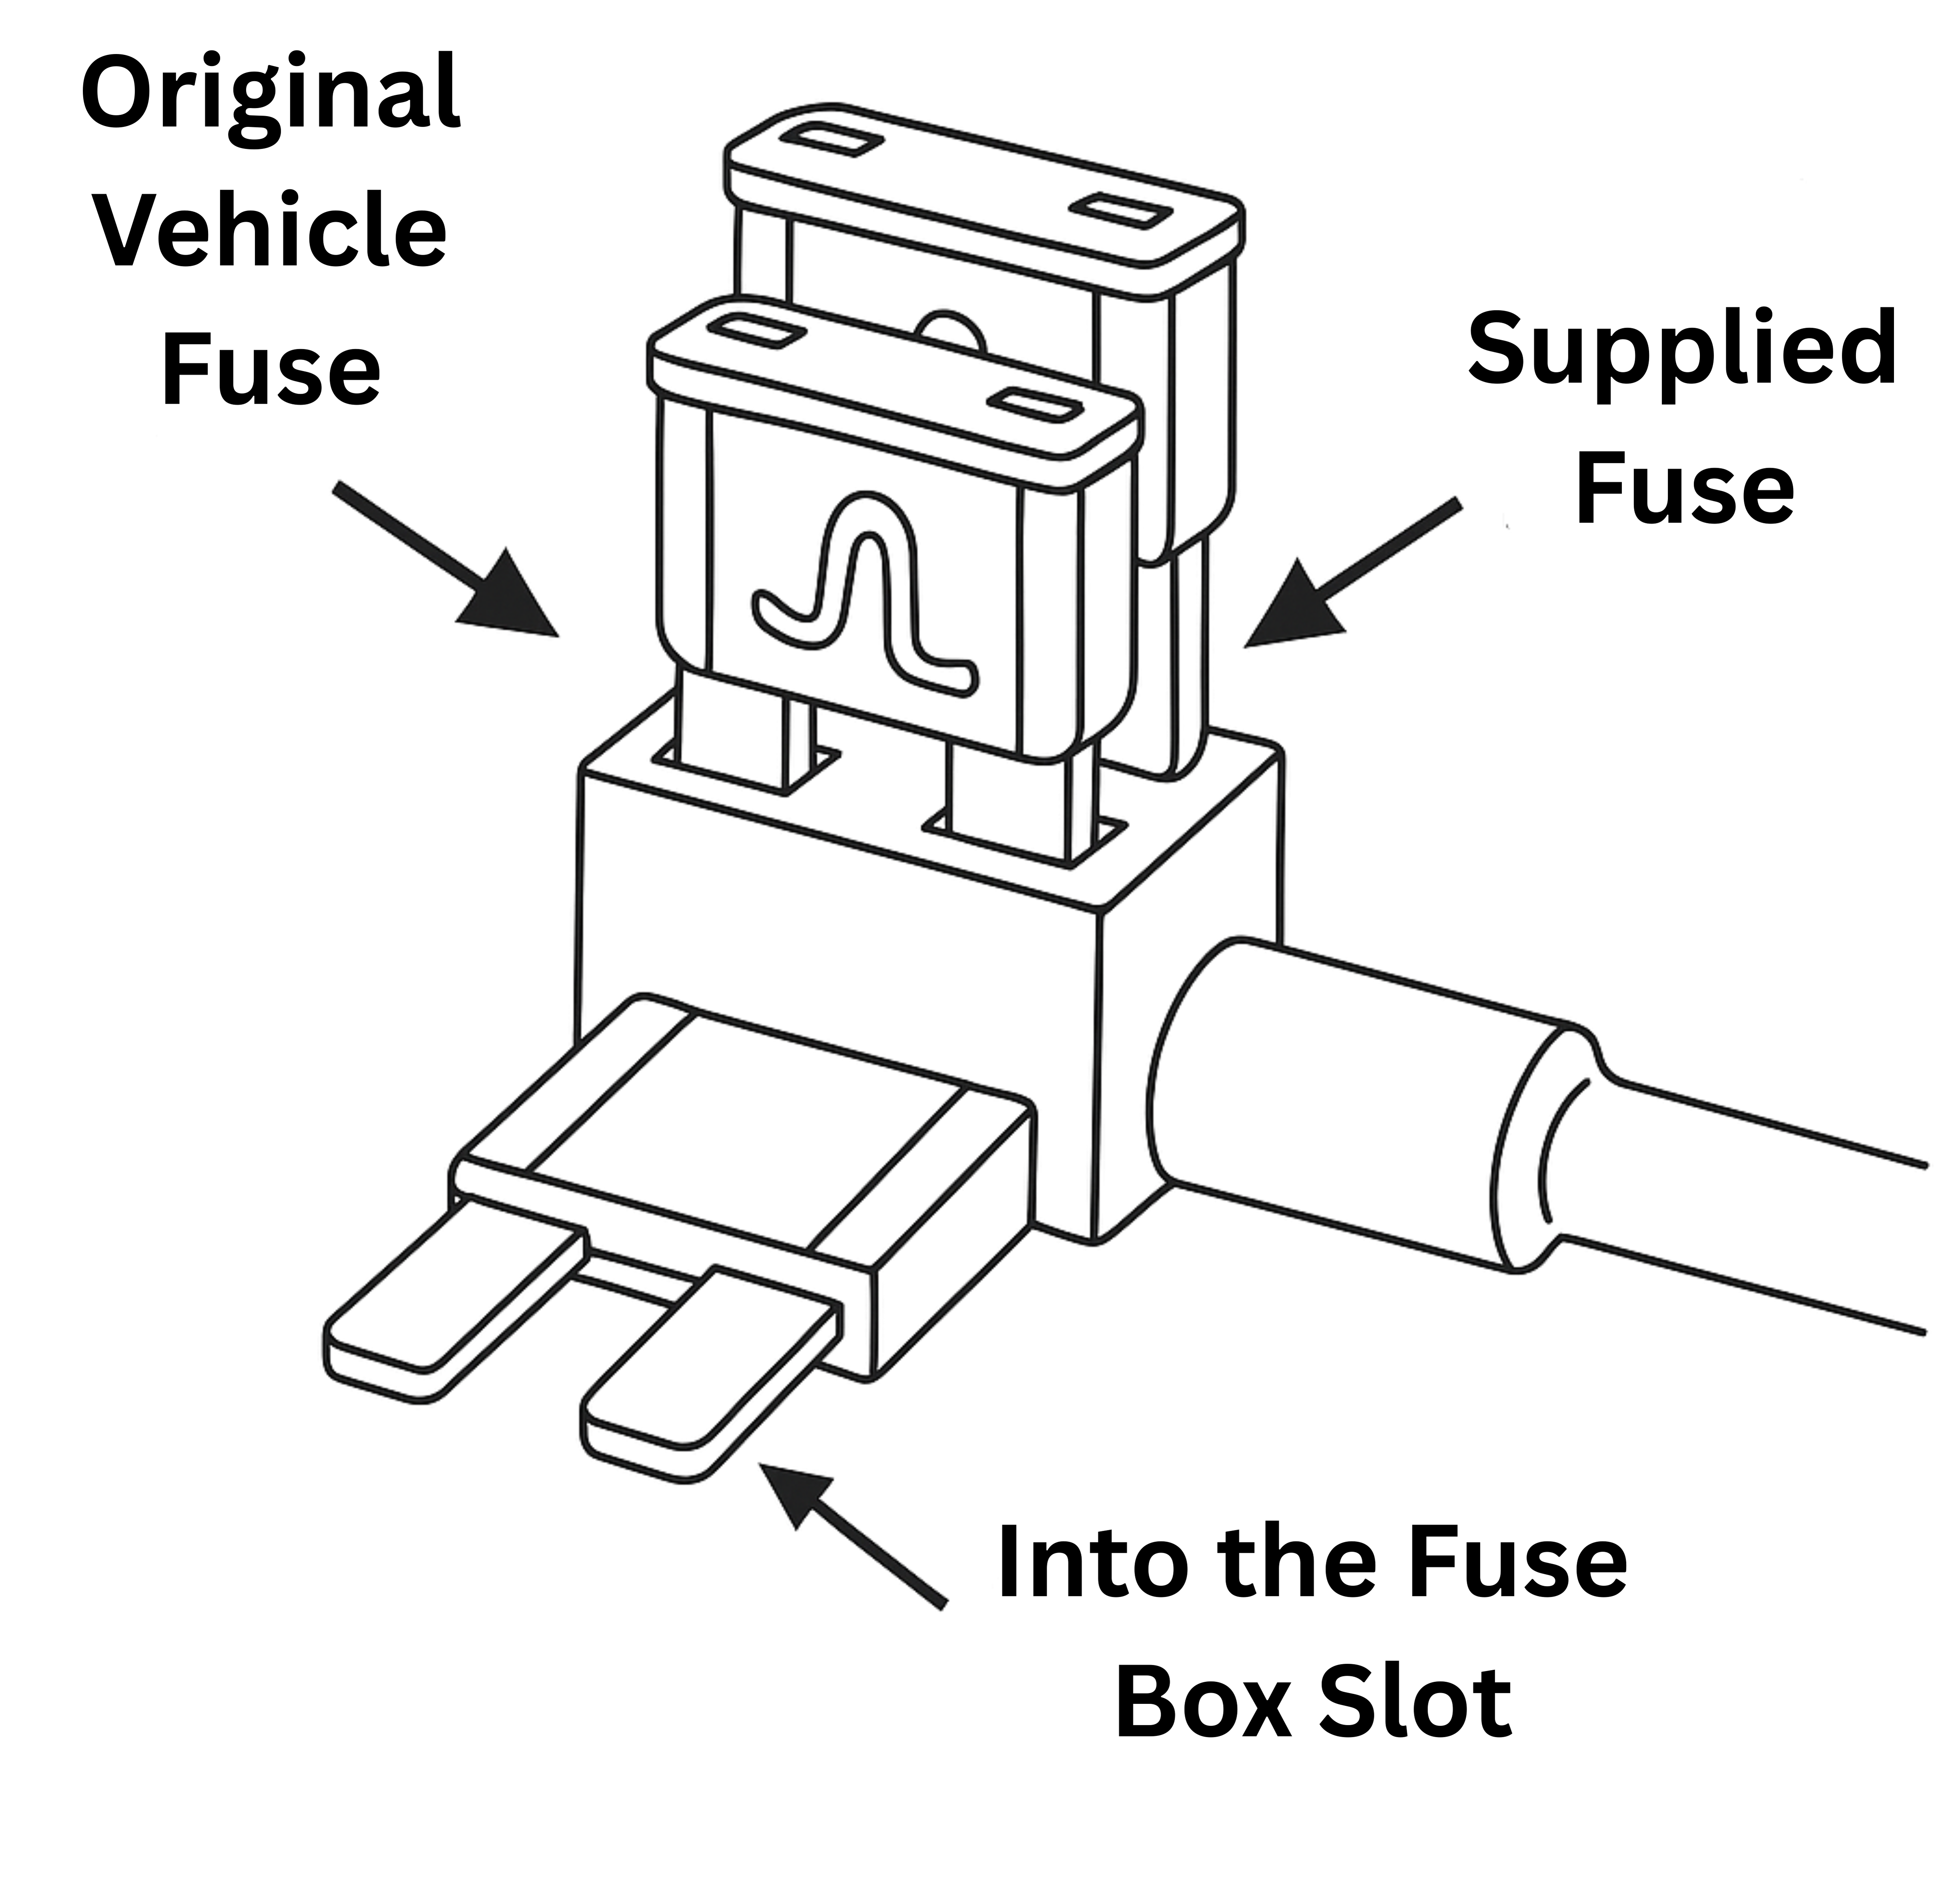
4. Install the Add-a-Fuse
Remove the selected fuse from the fuse box slot.
Insert the original vehicle fuse into the lower slot of the add-a-fuse adapter (this ensures the original circuit is still protected).
Insert the supplied fuse into the upper slot of the add-a-fuse (this protects the RZ1 hub).
Plug the add-a-fuse securely into the fuse box slot. Ensure it is fully seated.
Connect the red wire (power) from the 2-wire harness to the pigtail lead of the add-a-fuse using the included crimp connector.
Note
If the add-a-fuse is not fully inserted or oriented correctly, the hub may not power on. Double-check orientation and seating.
5. Connect Ground
Locate a clean, unpainted metal bolt or chassis ground point near the fuse panel.
Secure the black wire (ground) from the 2-wire harness to this bolt.
Tighten firmly so the connection cannot loosen from vibration.
Tip
For best results, lightly sand or scrape the metal contact point to remove paint or corrosion before attaching.
Tip
Common locations for ground connections include kick panel bolts, seat frame bolts, or factory grounding posts. Always ensure the connection is tight and free of paint or corrosion.
6. Connect to the Hub
7. Mount the Hub Securely
Note
Ensure the device is placed under the dash in a well‑ventilated area.
Do not block or cover the air vents on the device, as proper airflow is required for safe and reliable operation.
8. Organize and Secure Cables
Route wires neatly along existing harnesses.
Use zip ties and adhesive wire clamps to hold them in place.
Keep cables away from moving parts, sharp edges, and hot components.
Coil and bundle any excess cable, securing it out of sight.
9. Restore Power & Verify
Reconnect the negative battery terminal.
Check the RZ1 hub, the green LED should illuminate immediately since the hub is now connected to constant power.
-
If the hub does not power on:
Confirm the add-a-fuse is seated correctly.
Verify the ground connection is secure.
Re-check fuse orientation and power source with a multimeter.
10. Finalize Installation
Replace any fuse box covers and trim panels that were removed.
Double-check that wires are tucked away and not pinched under panels.
Perform a quick inspection to confirm everything is secure and tidy.
Continue to Step 3: Activate, Verify, Complete to finish setup and confirm hub connectivity.