A DVIR (Driver Vehicle Inspection Report) records the condition of your vehicle before and after trips. Completing a DVIR helps ensure safety and compliance by documenting any defects and confirming the vehicle’s readiness for operation.
Steps to Start a New DVIR
-
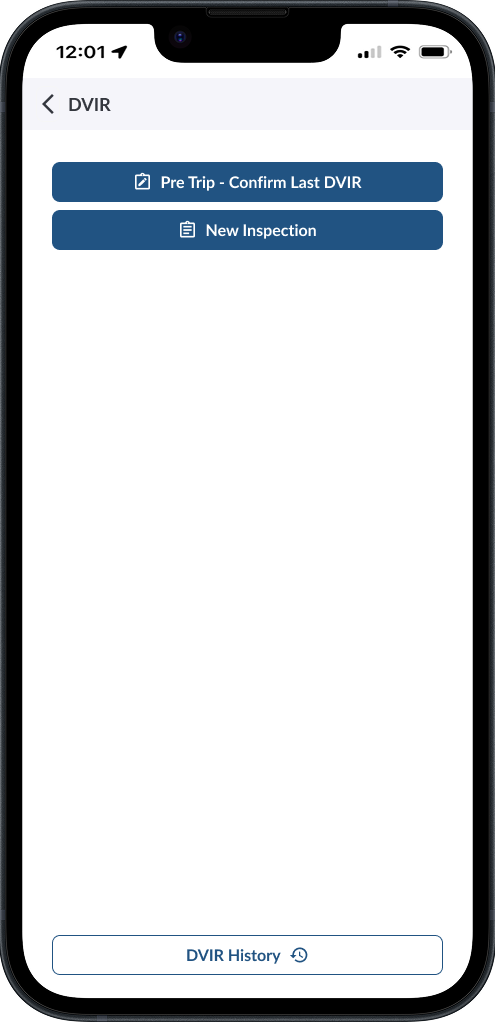
Open DVIR Tab - From the Driver App home page, tap DVIR.
-
Select New Inspection.
-
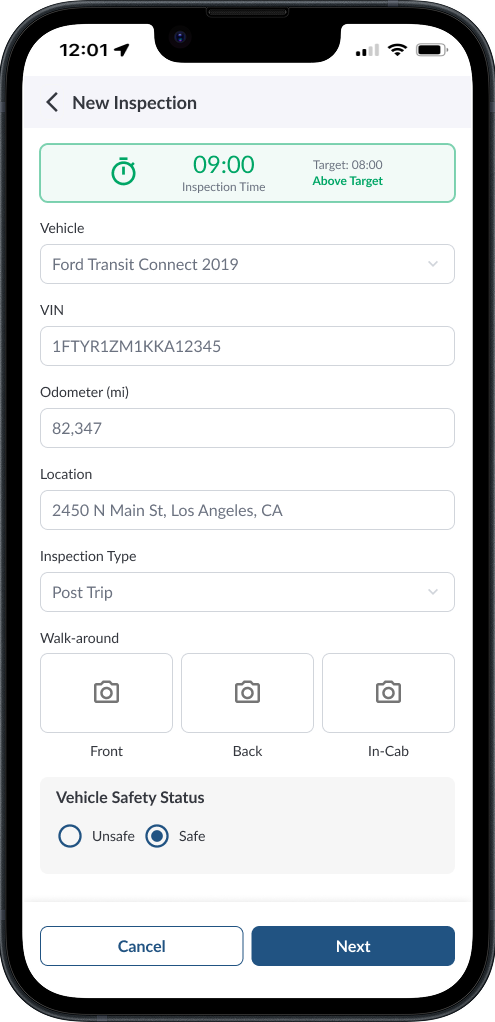
Fill Vehicle Details - If you are already checked in to a vehicle, the app will automatically pre-fill details such as Vehicle, VIN, Odometer, License Plate, and Location. Confirm that the information is correct before continuing.
Note
If you are not checked in, you’ll need to manually enter the vehicle details when creating the DVIR.
-
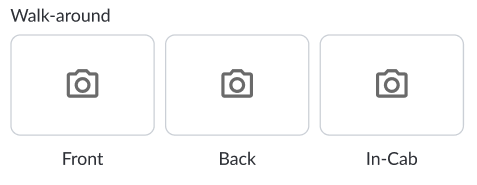
Walk-Around Inspection - If your fleet manager has enabled the walk-around inspection, you’ll be prompted to attach photos of the Front, Back, and In-Cab areas of the vehicle. Use the camera icons to attach the photos.
-
Report Defects - During the inspection, you can add any defects you find. Defects are recorded with details such as category, notes, photos, and status. These are sent to your fleet manager for review and resolution. For step-by-step instructions, see How to Report a Defect.
-
Review Existing Defects - If your fleet manager has enabled this feature, the app will automatically load a list of open defects for the vehicle into your report. This allows you to review any issues that were previously reported. If you confirm that a defect is no longer present, you can mark it as Resolved directly from the inspection. For detailed steps, see How to Update a Defect.
-
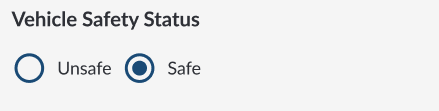
Set Vehicle Safety Status - At the bottom, choose whether the vehicle is Safe or Unsafe to operate.
-
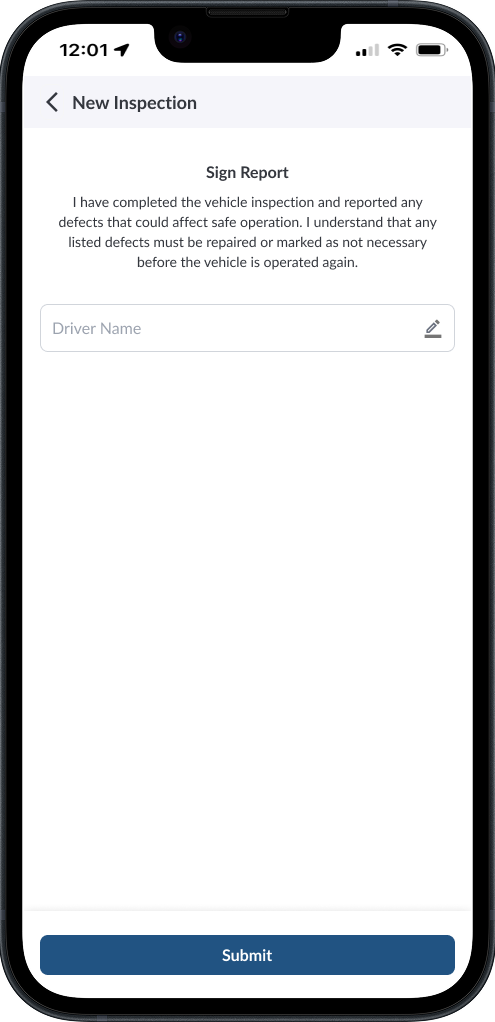
Sign and Submit - Once the inspection is complete, you’ll need to sign off on the DVIR to confirm its accuracy. Enter your driver name, then tap Submit to send the report. This finalizes the inspection and makes it available to your fleet manager for review.
-
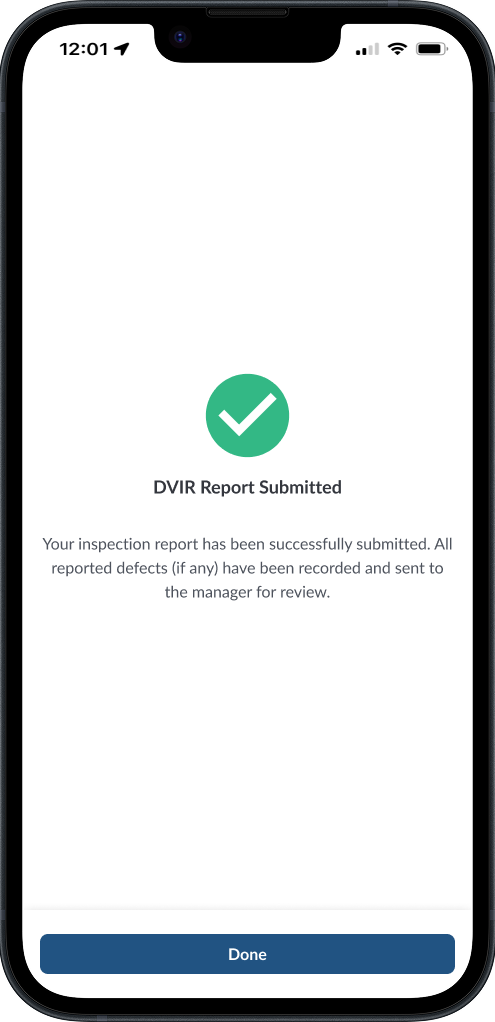
Confirmation - After submission, you’ll see a confirmation screen that your DVIR report has been sent. Tap Done to return to the home page.
Note
If your fleet manager has enabled the timer feature, a timer will appear
at the top of the inspection. This ensures a minimum inspection time
is met. While the timer is below the required time it will display in
red, and once the minimum time is reached it will turn green.
Note
Signing the inspection is mandatory. The inspection is only saved and
sent to the fleet manager after you sign and submit.